Back to the Forger
...I'll see myself out.

I haven’t done a blacksmithing write up in a bit, but I have been out at the anvil a bit over the past 7 months. Not as much as I would like, what with the move, the renovations, the new job, etc. But some stuff happened, so I am going to try out this new image gallery function and play catch up!
Little Christmas Hammers for the Little Hammers


The last project for 2022 happened literally two days before Christmas, when I had the great idea to make tiny tack hammers for my girls to use putting together their little wood kits we get from Home Depot and Lowes1. All being under the age of 10, even my smallest ball peen gives them a little trouble and needs to be wielded two handed. I had the giant coil spring my mechanic at Lament’s Auto Service gave me, and that seemed just the right size, so I cut it up into four 2” chunks and started shaping and drifting them!
That was my first mistake.
If I had been thinking, I would have shaped and punched the holes before cutting. As it turns out 2” chunks of steel are really awkward to work with when hitting it with a 3 lb hammer. Many times the hot bit would shoot out of tongs only to come to rest under my wife’s car about 15 feet away. Typically within a few inches of one of her tires. Nothing gets you in the Christmas spirit like repeated fear that you are going to melt through a bloody radial.
Another issue with little tiny bits is that the punch I was using tended to get stuck ,which always happens when you don’t have punch lube, and the tiny hammer head meant I couldn’t get much leverage to dig the bastard out. You can see the result in the first picture there, as I heat up the head to loosen it a bit around the punch. Once I had the holes punched the whole way through an old drag bar for a tractor provided a nice hole to knock out punches from the other side. Thanks to my brother in law who found the damned thing in a shed and thought of me.
The second picture in the set there highlights why I cut 4 parts for 3 hammers: one punch was off center. The three good ones are on their way to polish town, lubricated by a fair bit of my skin and blood, another good reason to have not cut them down to half the size of my thumb so early!
The third picture in the top row there shows the handles. The wood is from an oak dowel rod that I have had for… almost two decades. I am not kidding, I am pretty sure I bought that in my early 20’s when I was experimenting making chainmail, and have taken it with me across many states. Glad to finally have a use for it, before it starts to belong in a museum of early century wood work.
The picture on the bottom right shows the finished hammers with their nice tung oiled handles. The fact every handle is slightly different, as well as the heads, is actually intentional. One hammer has a very narrow side for sneaking in between other parts, one has more of a rounded head, and since all the girls are different sizes I figured they could choose a handle that was the most comfortable.
One thing I didn’t do is harden and temper the heads. In part that was because I was a little worried about them hitting the hammers against each other and launching shards, and because I figured when used properly the tough spring steel would be fine nailing in the little brad nails in their kits. The other reason is visible in the last picture there: a big stress crack in the steel. This is a big problem with using second hand steel in projects. You never know what weaknesses or cracks are lurking inside2, and those can crop up at the worst times. Fortunately I saw the crack pretty early so I knew to avoid a heat treat, which might have make the crack spread from end to end. As it is it is ugly but not dangerous.
Merry Christmas!
Ax of Saw
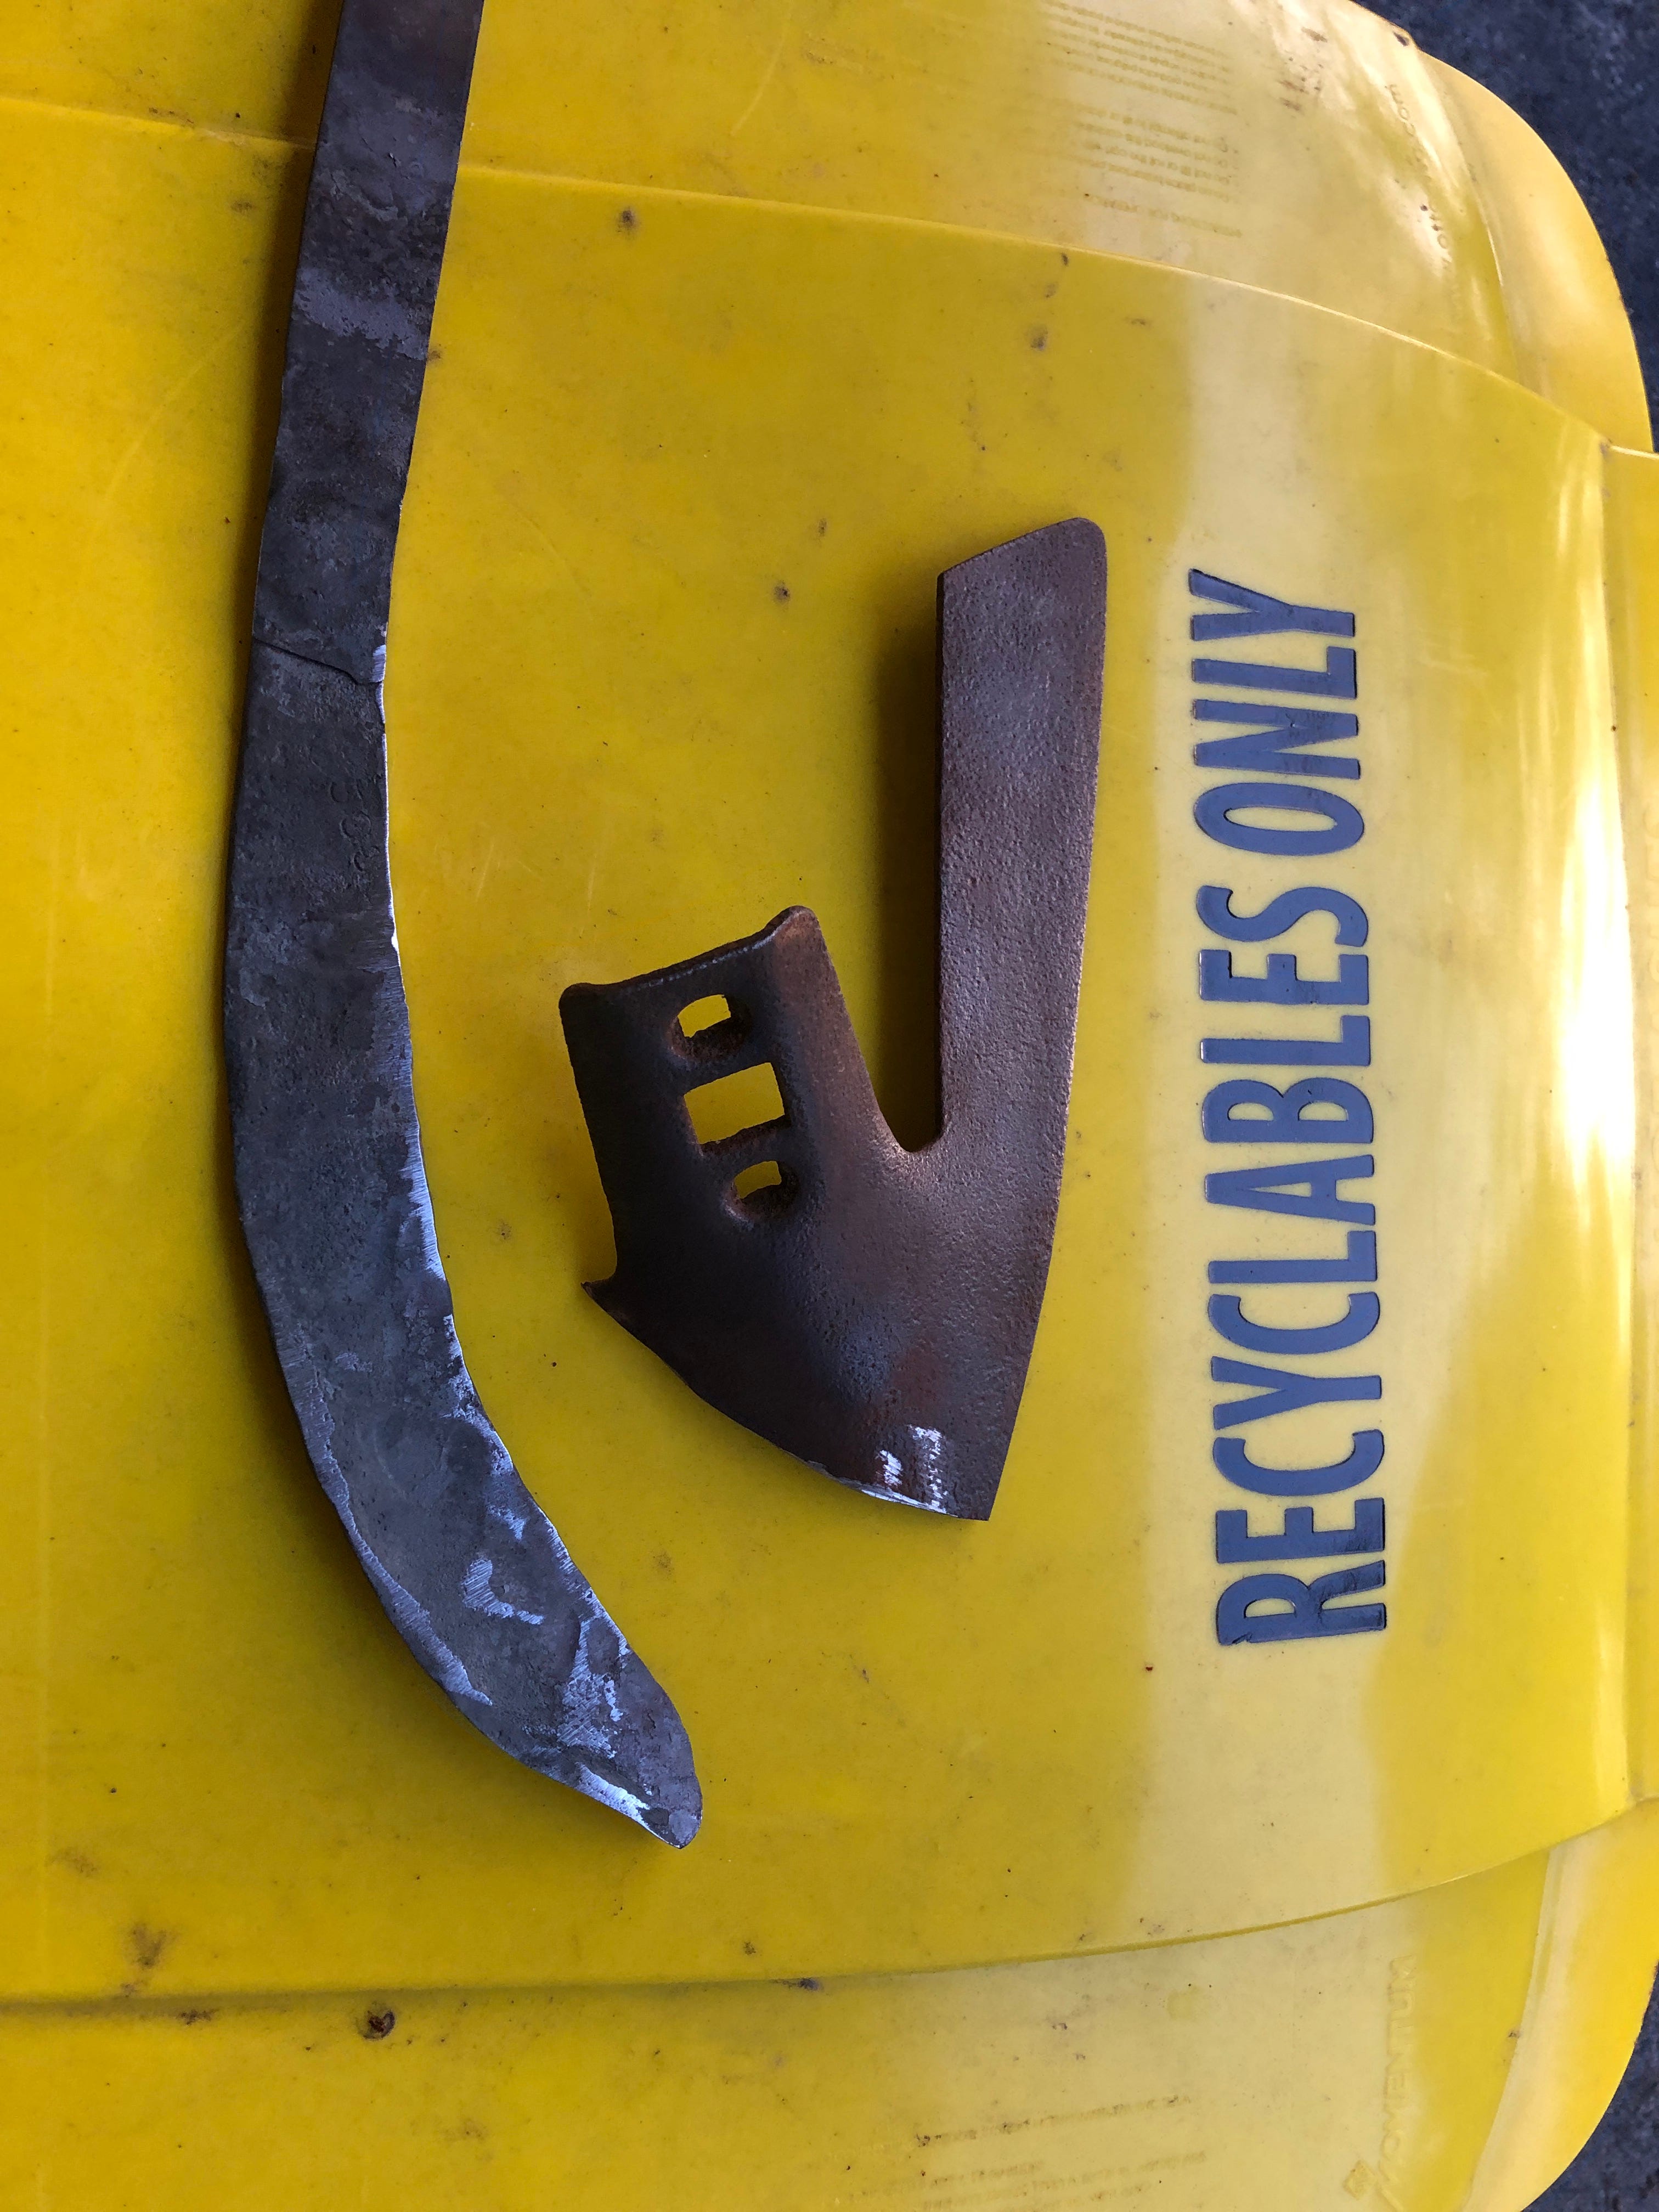
While I was screwing around with other stuff, such as that spear I made, I had also been playing around with an ax. Not a very good one, just a chunk of circular saw blade welded (forge on one side and electric on the other) to a steel strap to hold it onto a handle. Really this was just for practice welding, with a little proof of concept thrown in. I did however finish it up just before the holiday as well. (You can see the completed and ready to be sharpened head in one of the pictures above.)
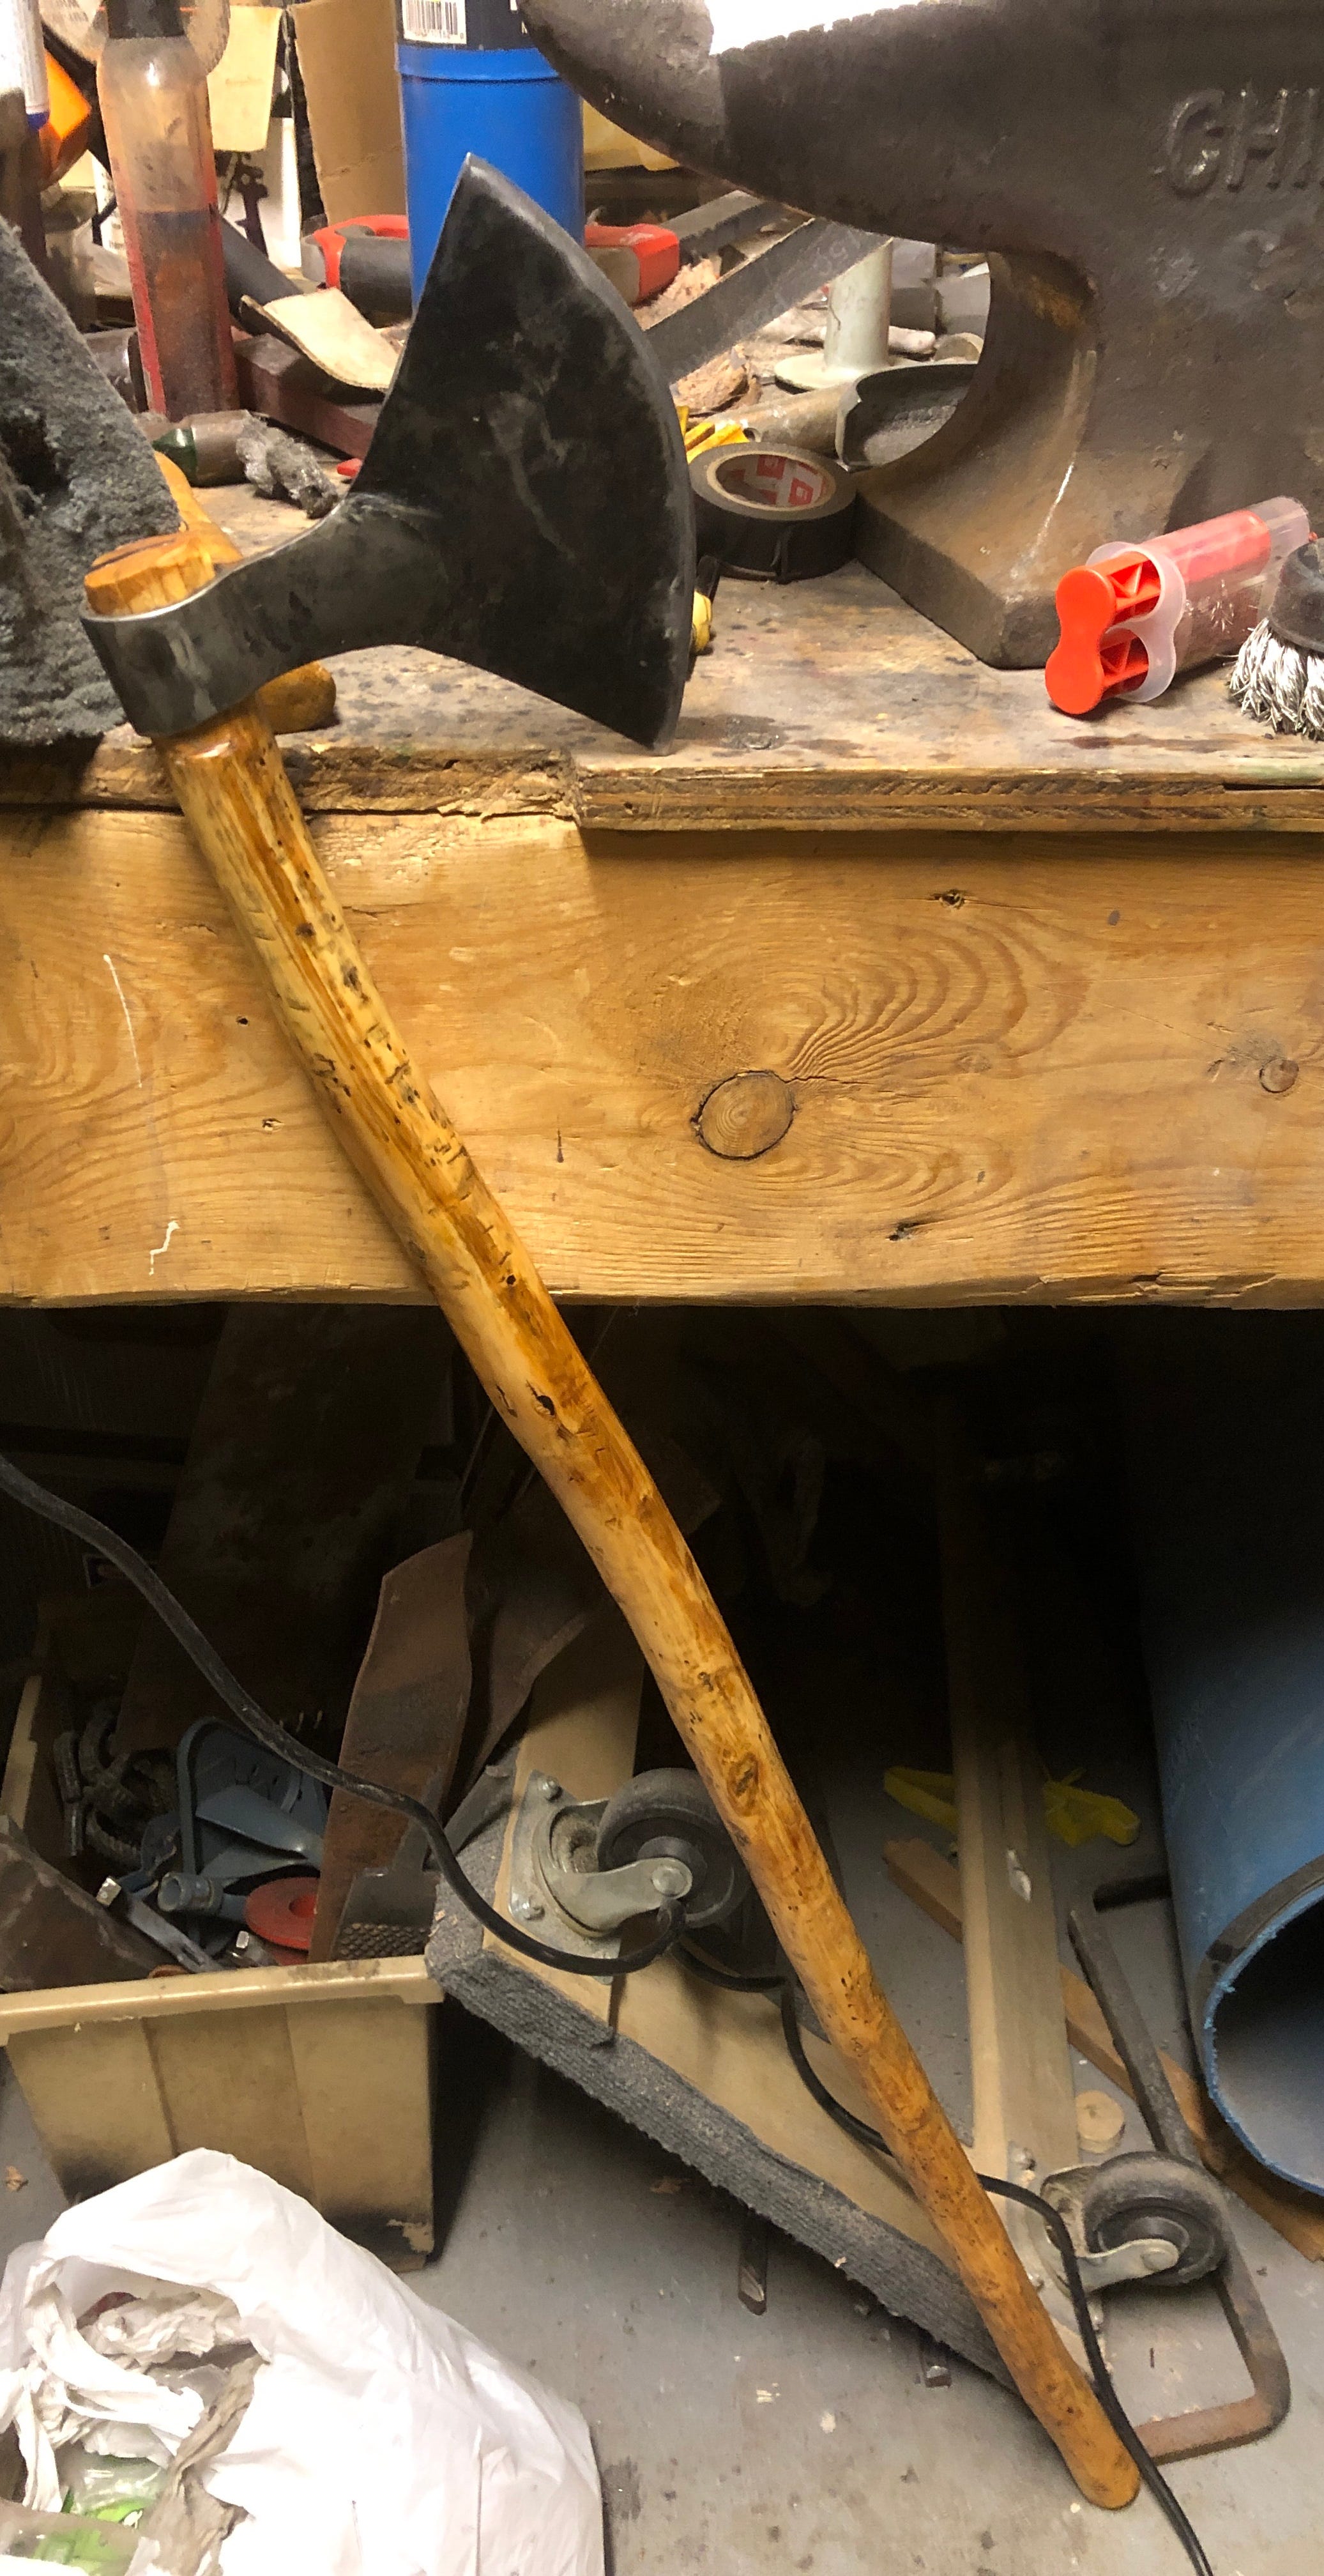
Now I haven’t actually cut anything with it. I gave it to my dad who now has it displayed above the mantle next to his knife and a Brown Bess musket. One of these days when I am visiting I am going to have to sneak it out and give it a test, while hoping I don’t break it. I had smashed it into a stump a half dozen times to test the welds, but still, the blade is only as thick as a good sized knife, which means it will be good for chopping meaty things but probably needs to stay away from wood.
Speaking of wood, isn’t that handle lovely? Apple wood straight from dad’s orchard. Which means the ax is now a hundred yards or so from the tree it came from… probably good that trees don’t think about that kind of stuff.
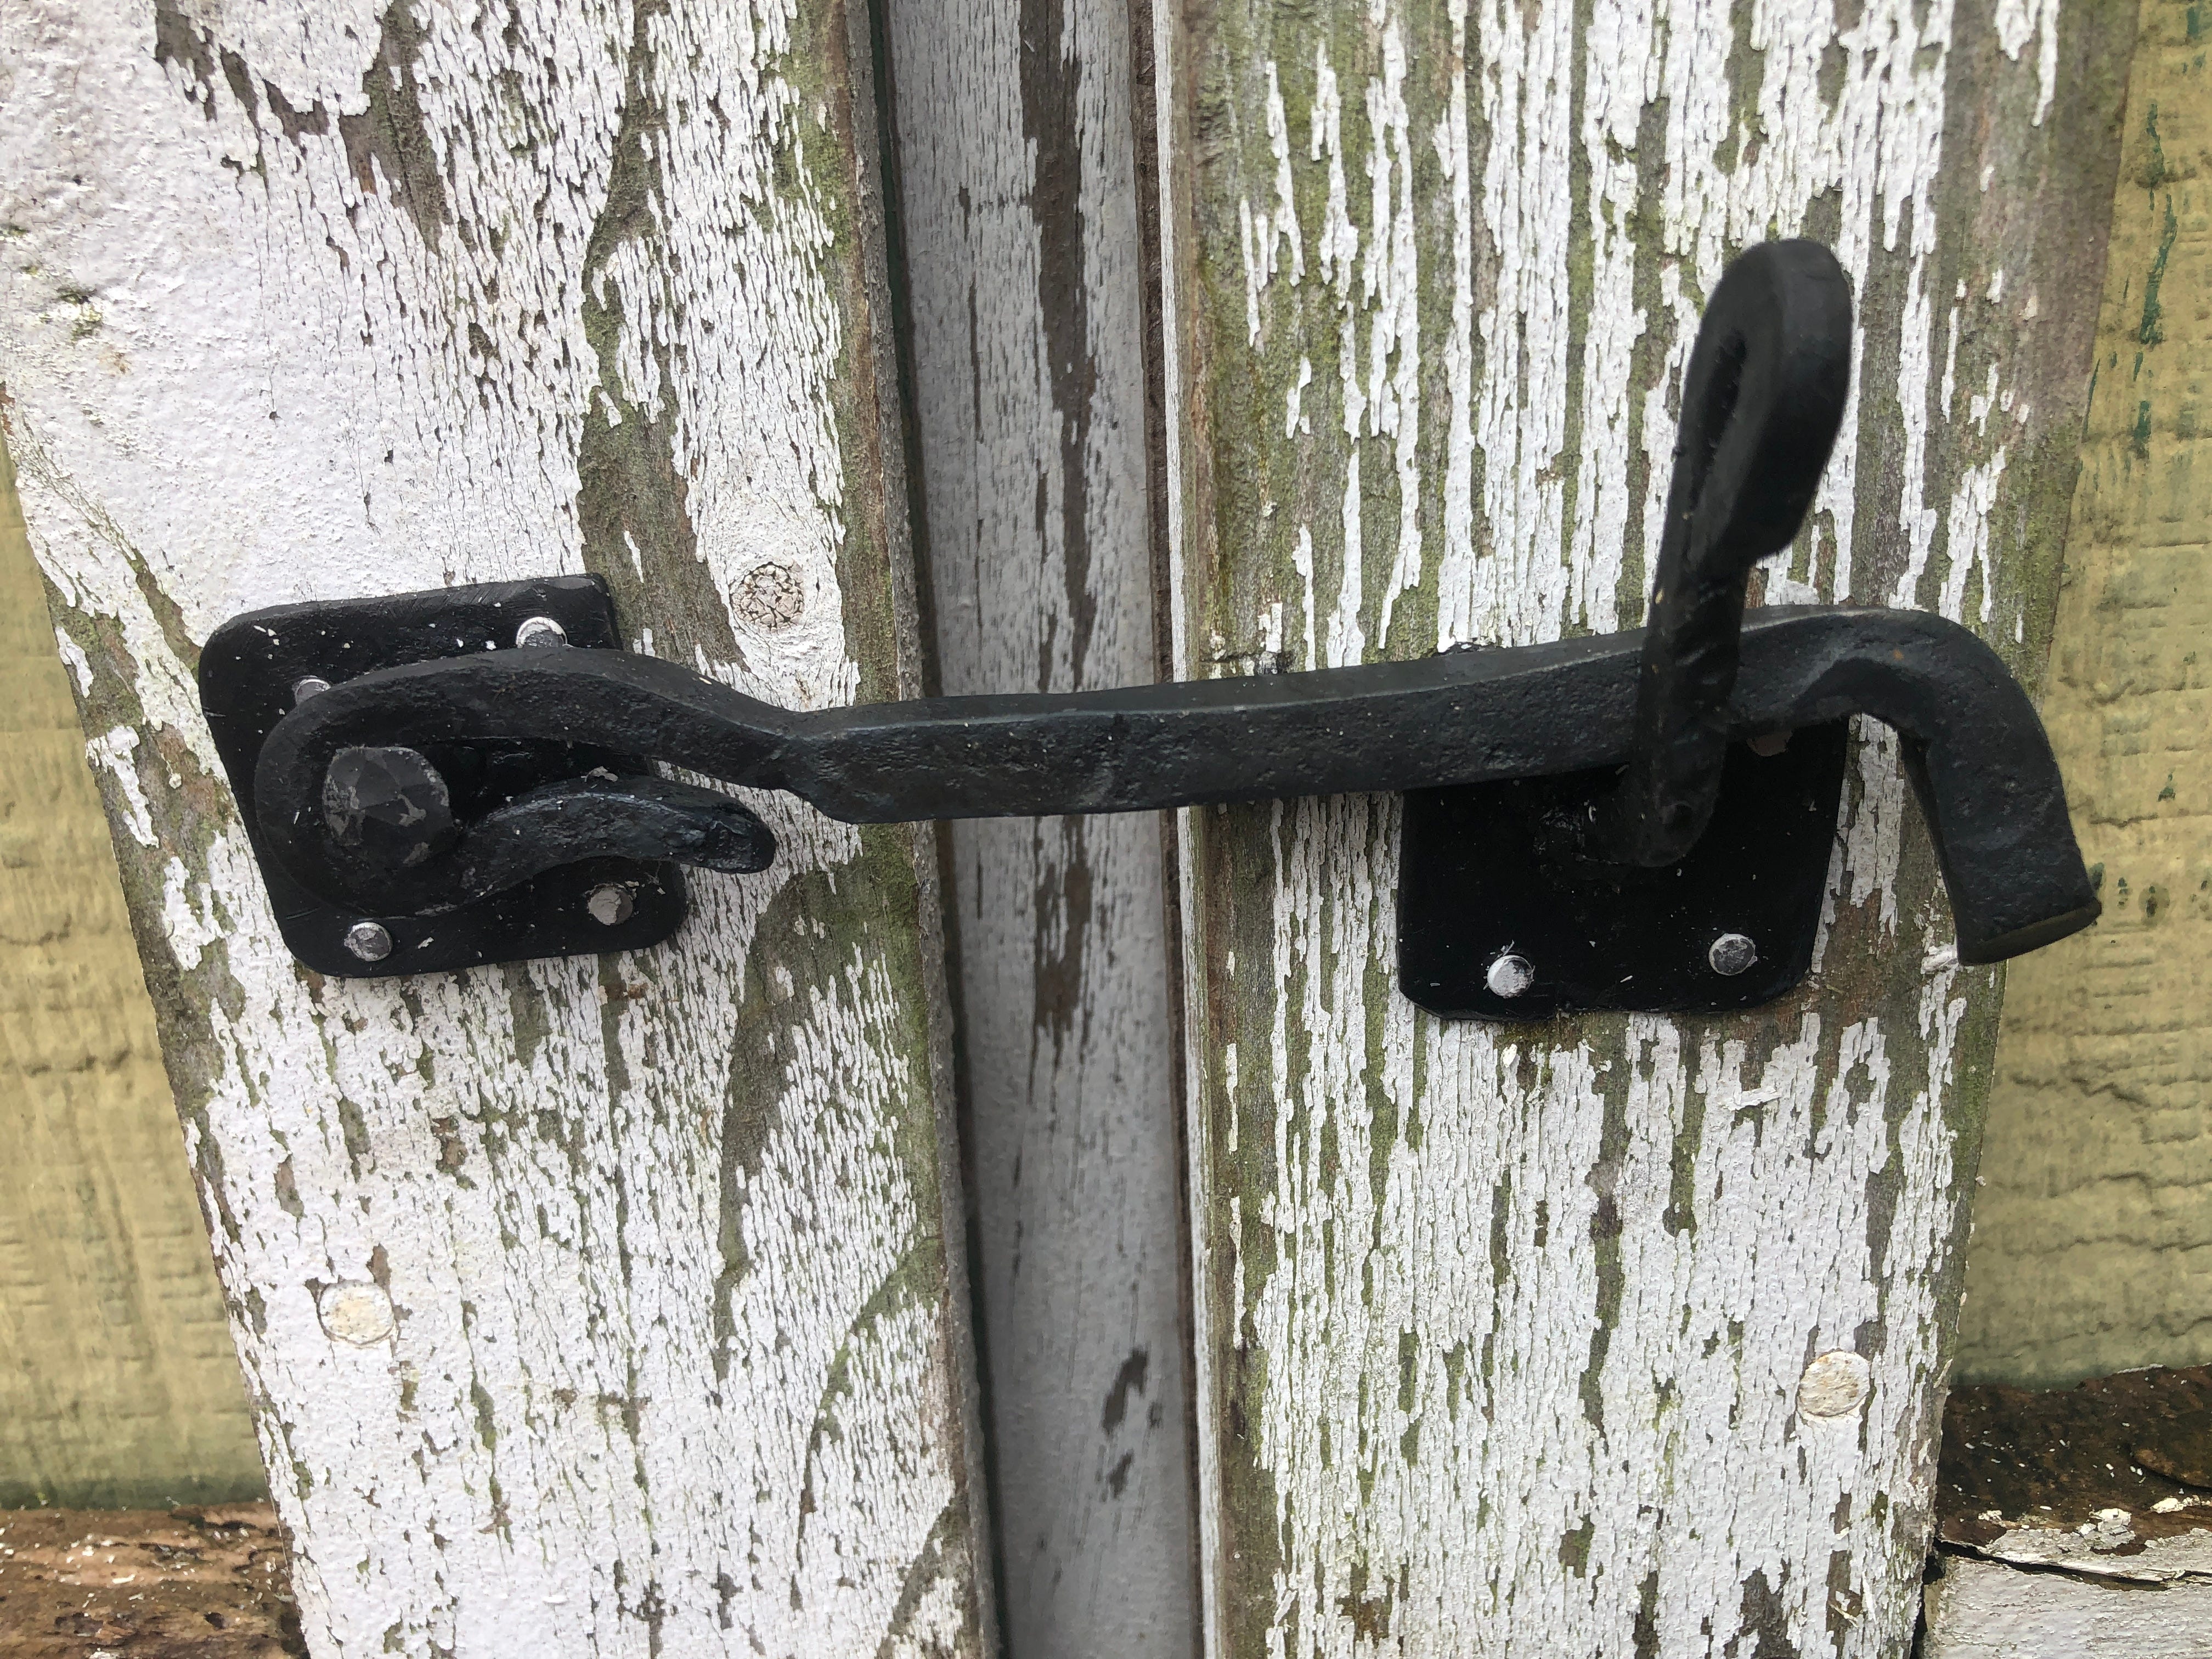
Of Latches and Squirrels
Then I moved!
As moving is stressful eventually I needed to go out and hit things. Fortunately the shed needed a new door latch, and we had space for a fire pit so I could try out making some long squirrel cookers.
Even more fortunately my middle daughter wanted to come out and help, which was a lot of fun and made things a great deal easier. Even an extra pair of tiny hands can help a lot.
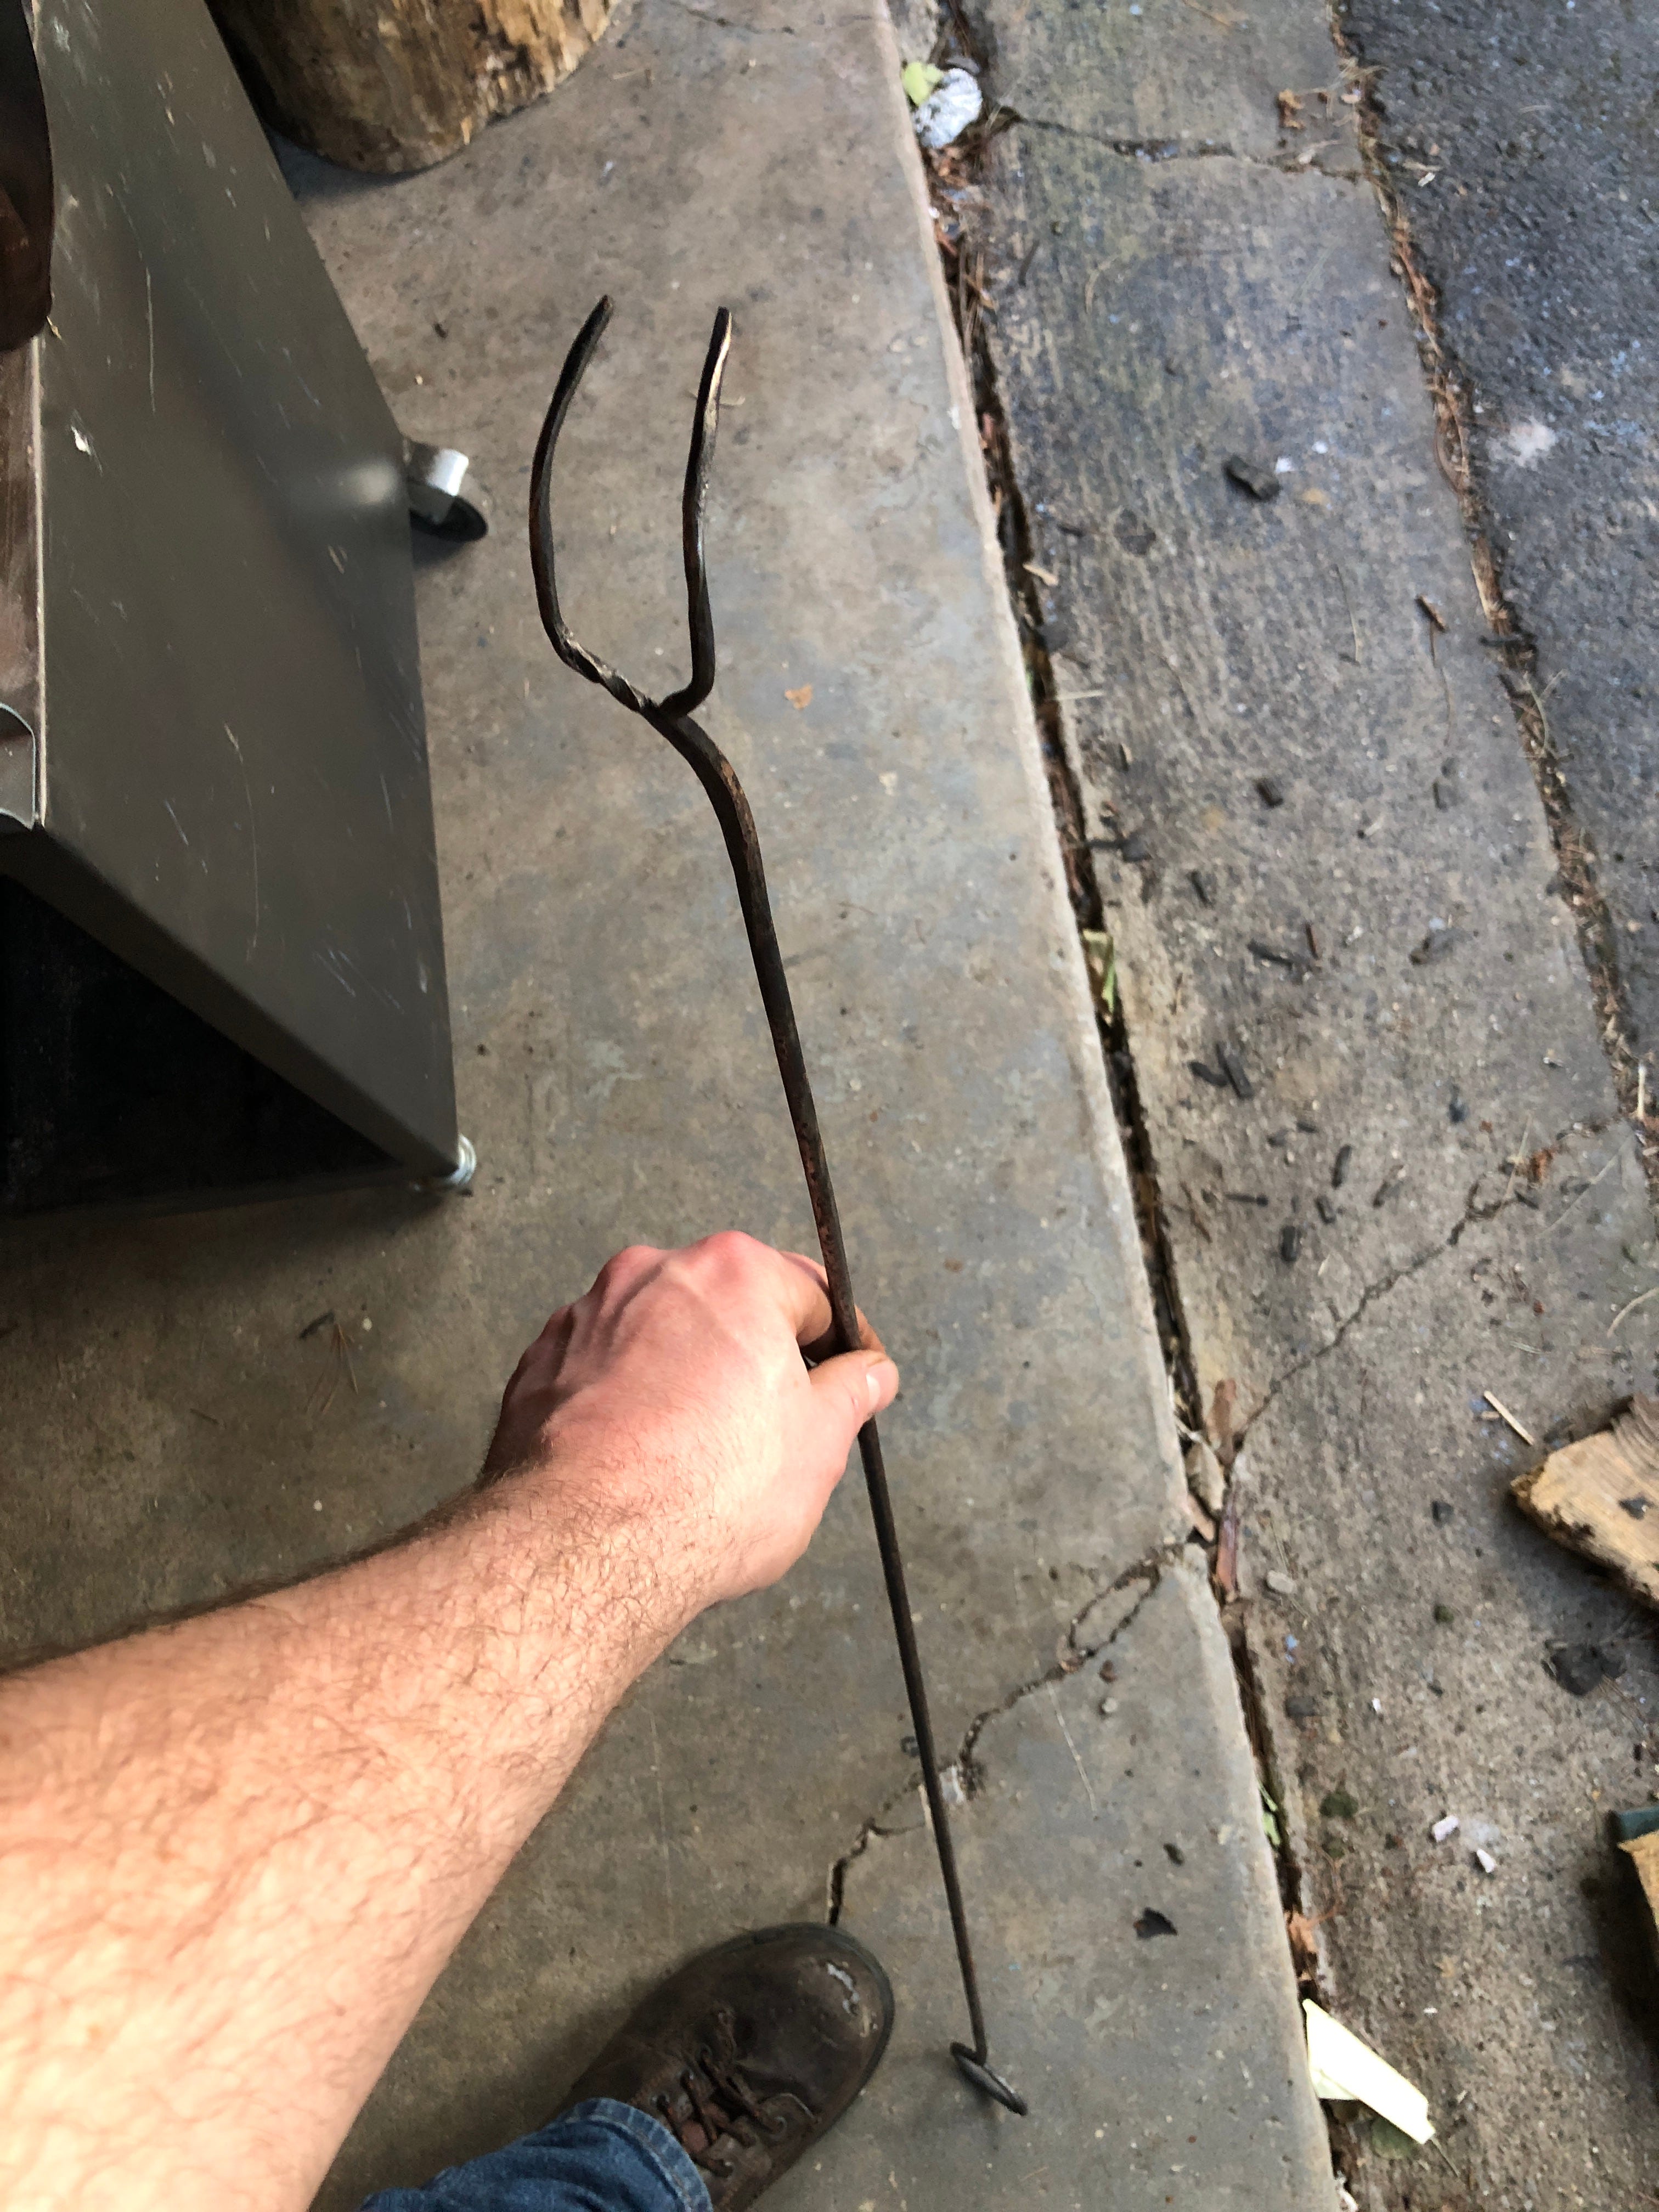
No, we didn’t actually cook squirrels, but the long forks are great for hotdogs and marshmallows. I made 3, by the simple expedient of drawing out one end of a 3/8’s rod and wrapping it into a circle, then flattening the other, chiseling a split, and shaping the fork around the horn of the anvil. (And my little bic, which always turns out handy.) The inspiration came from these two videos by Blackbear Forge: Squirrel Cooker and Forged Cooking Fork. John is great for easy watching and interesting blacksmithing stuff, if you are into this kind of thing.
Both projects were fun, especially with little Madeline helping out. I am going to have to get a stack of 3/8s bar next time I am at the scrap yard and make a dozen or so more forks. They ought to make nice little gifts for friends and family.
Now, on to my true love…
CHOPPERS
One thing with the new place is that everything in the house needs fixed. Another thing is that everything outside needs fixed, too. Particularly the previous owners let the yard get over run with vines, creepers, crappy bush things that are all over SE PA for some reason, and poison ivy. So much poison ivy.
The poison ivy requires something more sneaky for dealing with, but for everything else, there are heavy blades!
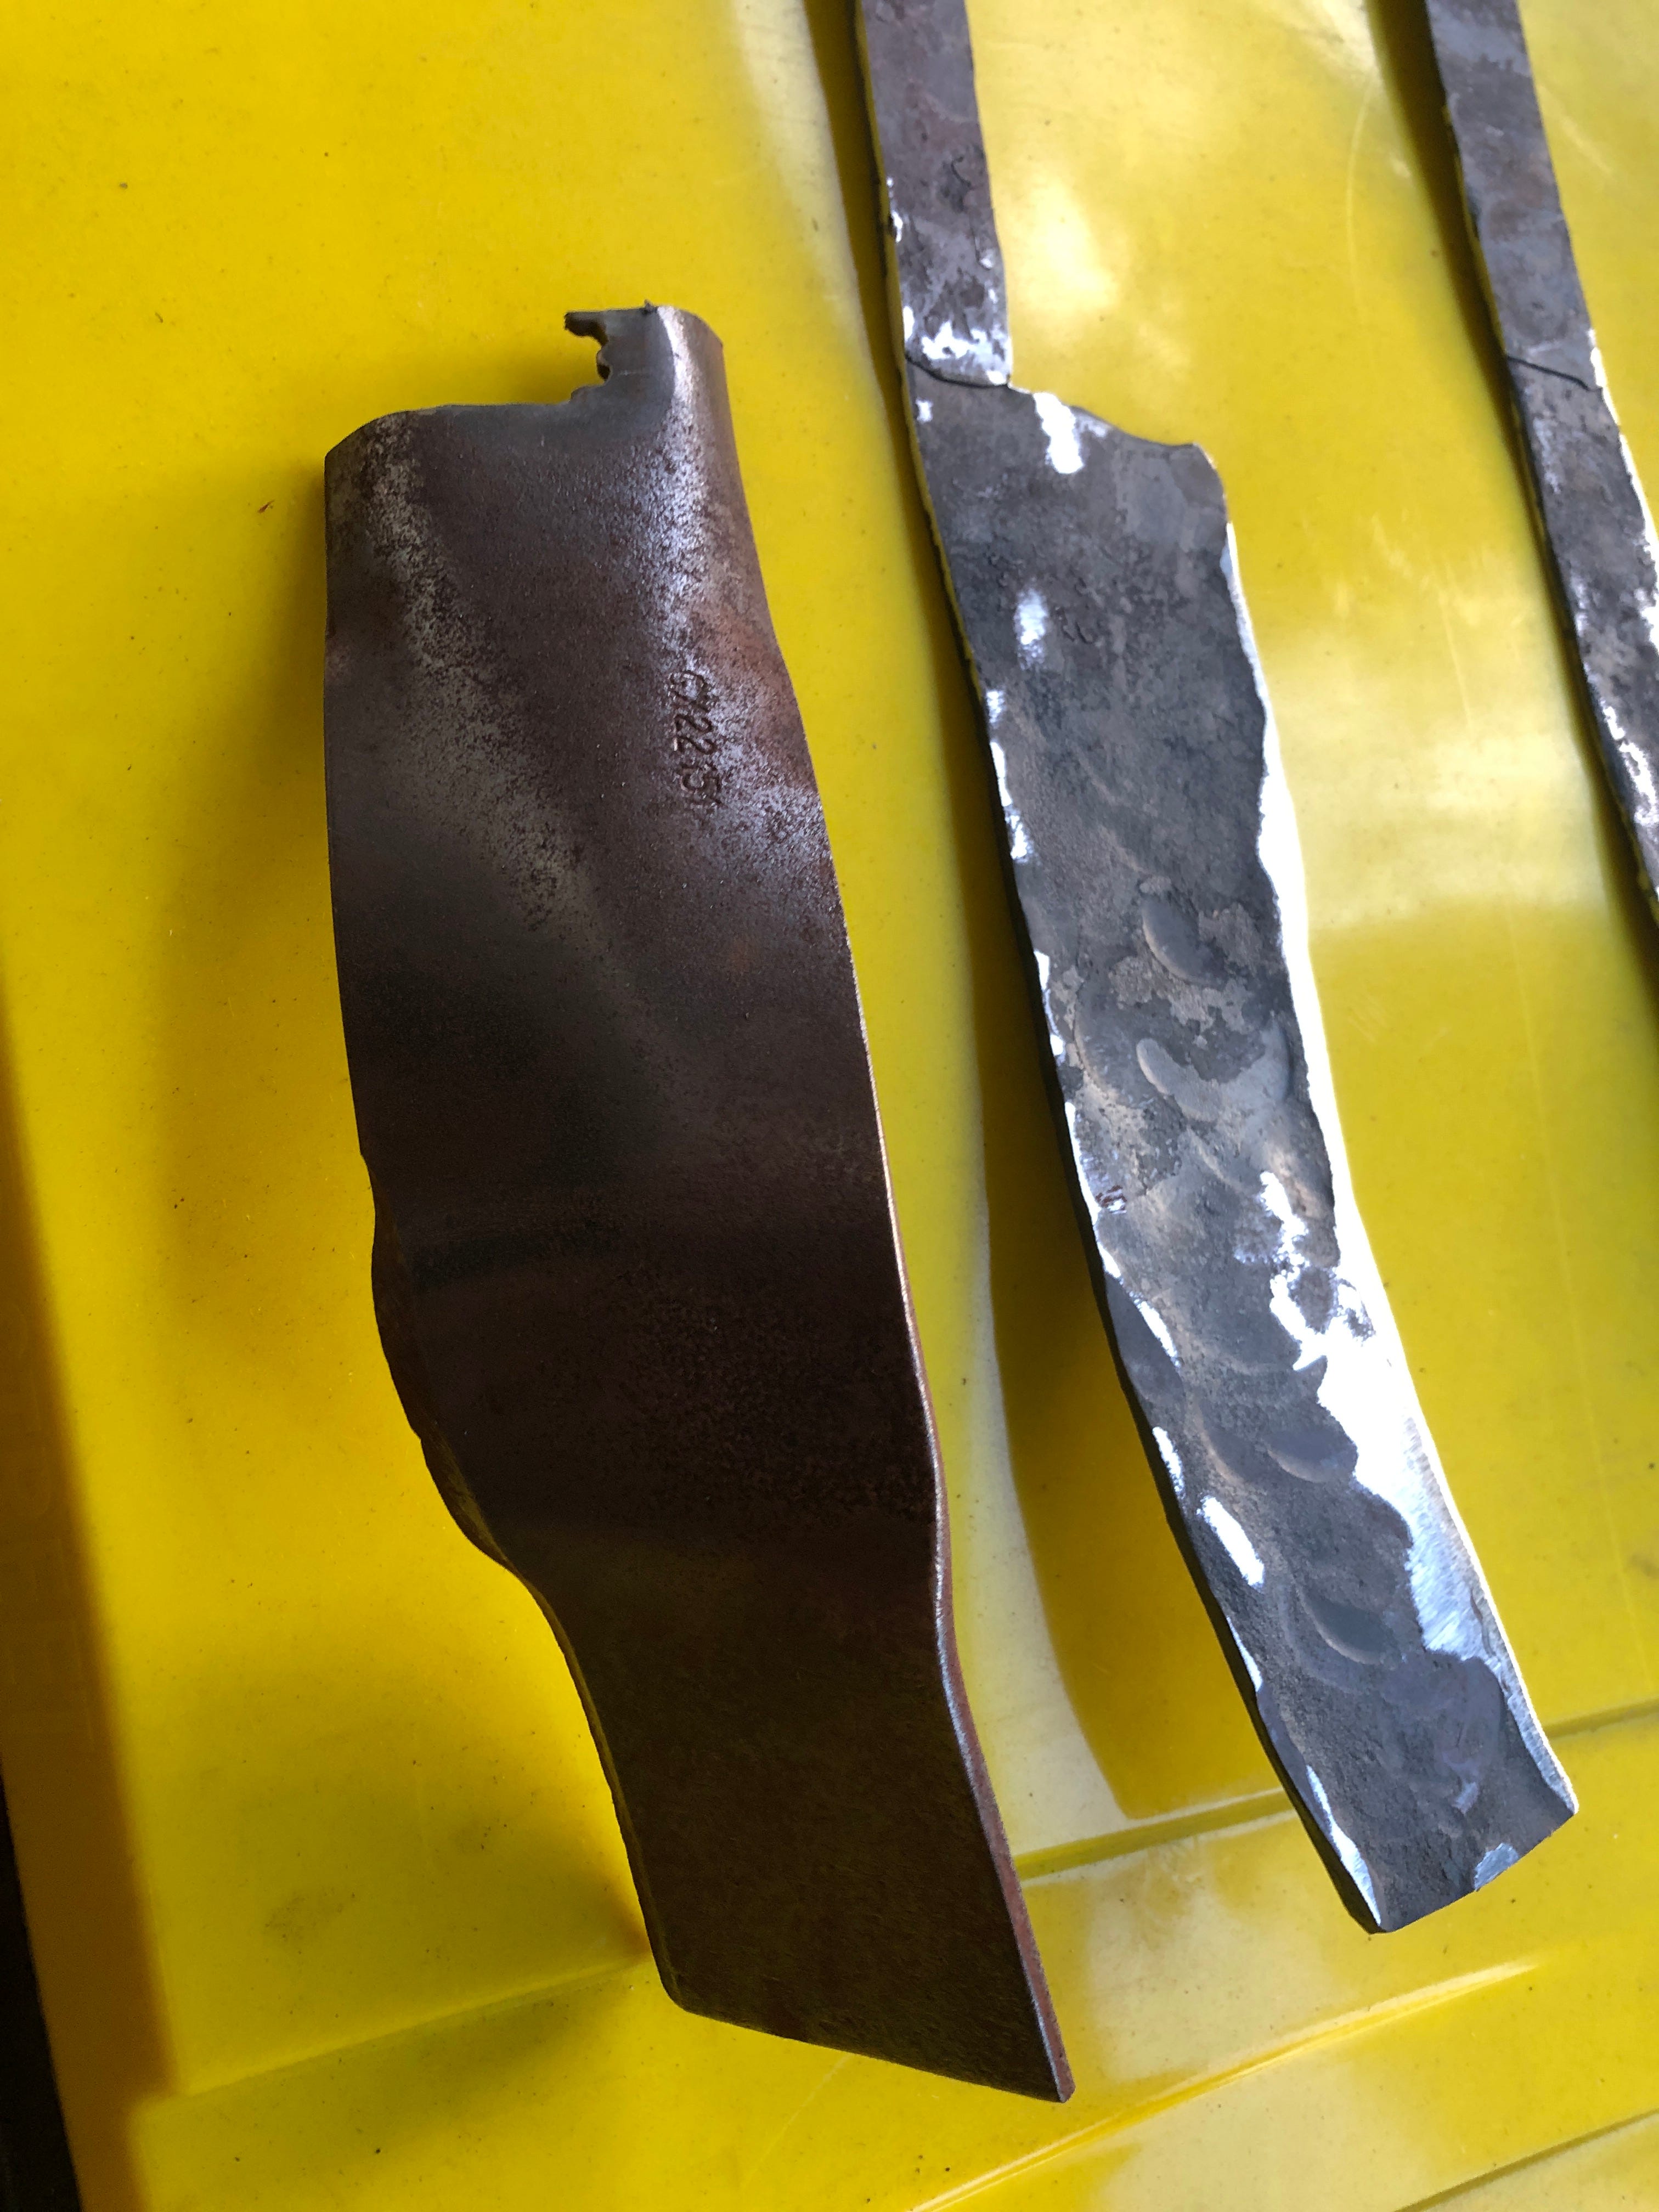
The original plan was for two billhooks, one thinner for one handed use, one thicker and mounted on a long handle. Both are high carbon steel forge welded to a mild steel bar, both to make a tang later and a really handy thing to hold instead of using tongs now.
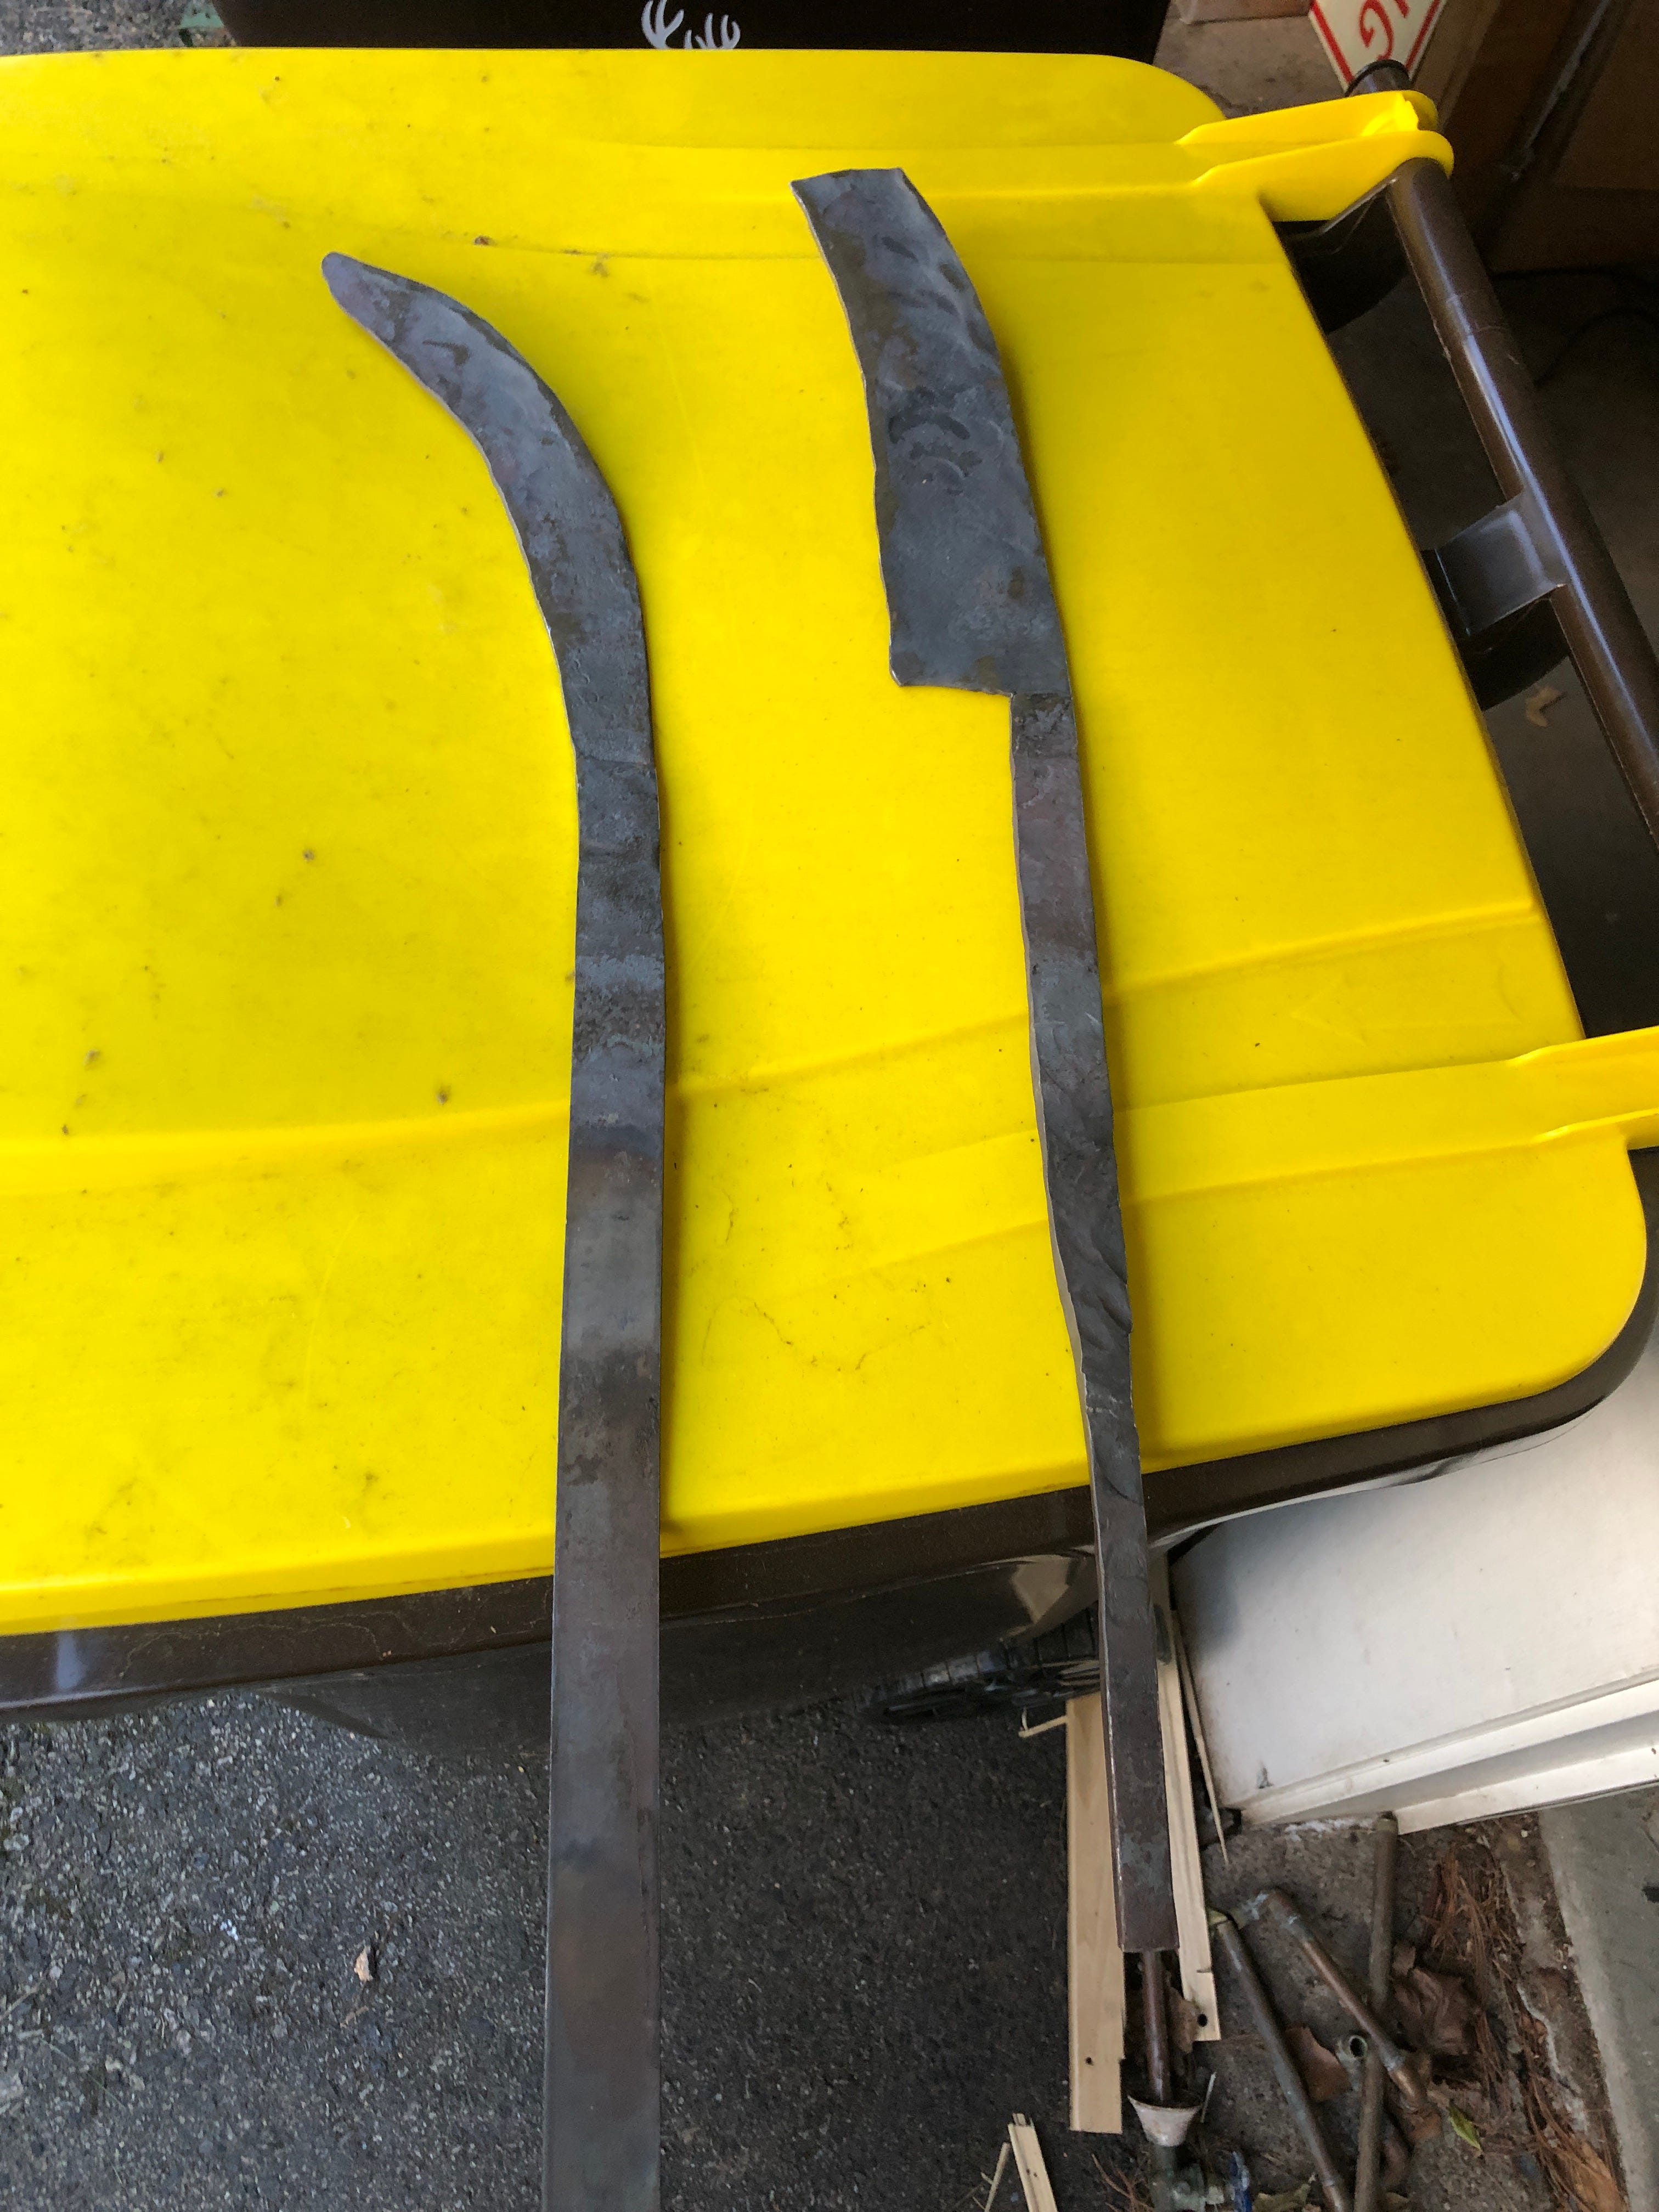
As you can see, the plans changed a little bit, particularly for the little one. It had a straighter blade with an almost 90 degree hook at the end, but after putting in the edge bevel the curve straightened out a fair bit even as I tried to get it to curve back.
Lesson learned: leave the curved part’s bevel for the grinder.
Now, I usually completely fail to take early stage “work in progress” pictures, and this was no exception. I like to make stuff more than I like talking about making things. (Taking pictorial evidence of making things?) However, both of these came out of chunks of stuff I had lying around, so that helped.
I also took a cute little video of heat treating the smaller bill. Let’s see if this works…
After a lot of pounding and grinding (great name for a blacksmith themed pick up club) I made some nice progress.
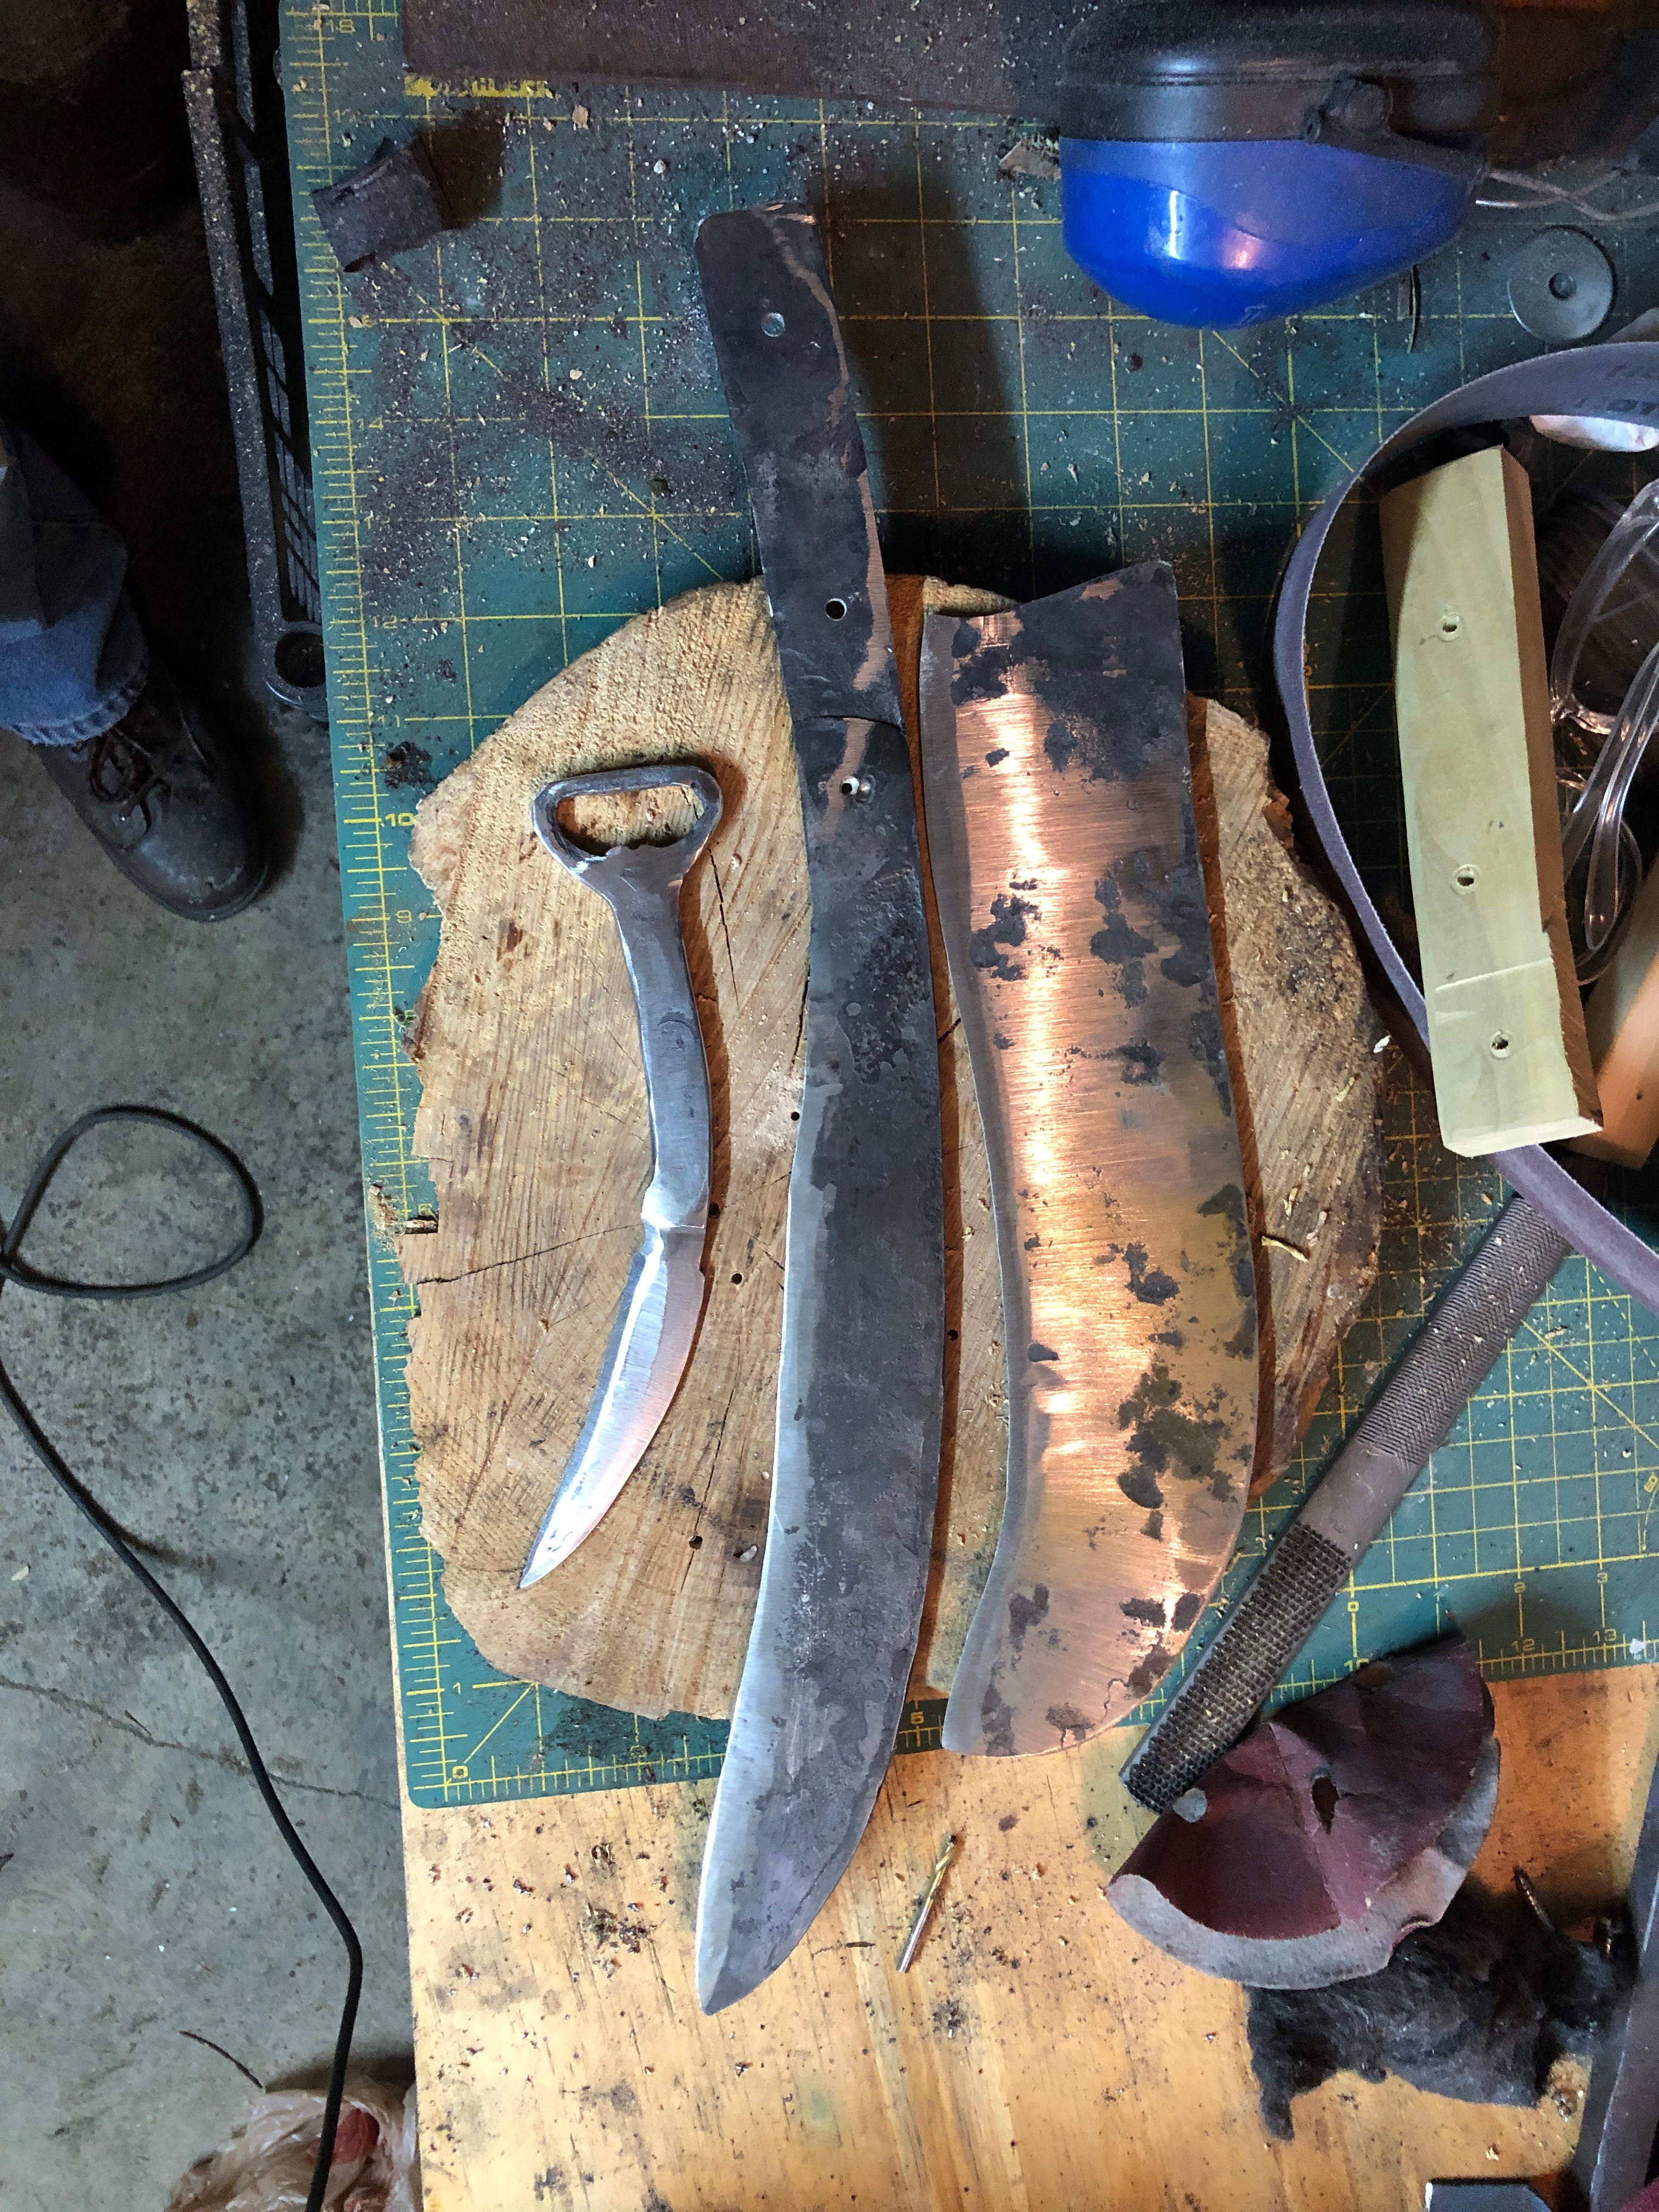
Of course they need some handles. The big one also needs some hoops/eyes to hold a handle, because the weld broke off. I think I squished it a little thin, but honestly I was surprised. *sigh* I did get some made, and I promise I will take a picture sooner or later.
But, lil’ choppy did get done!
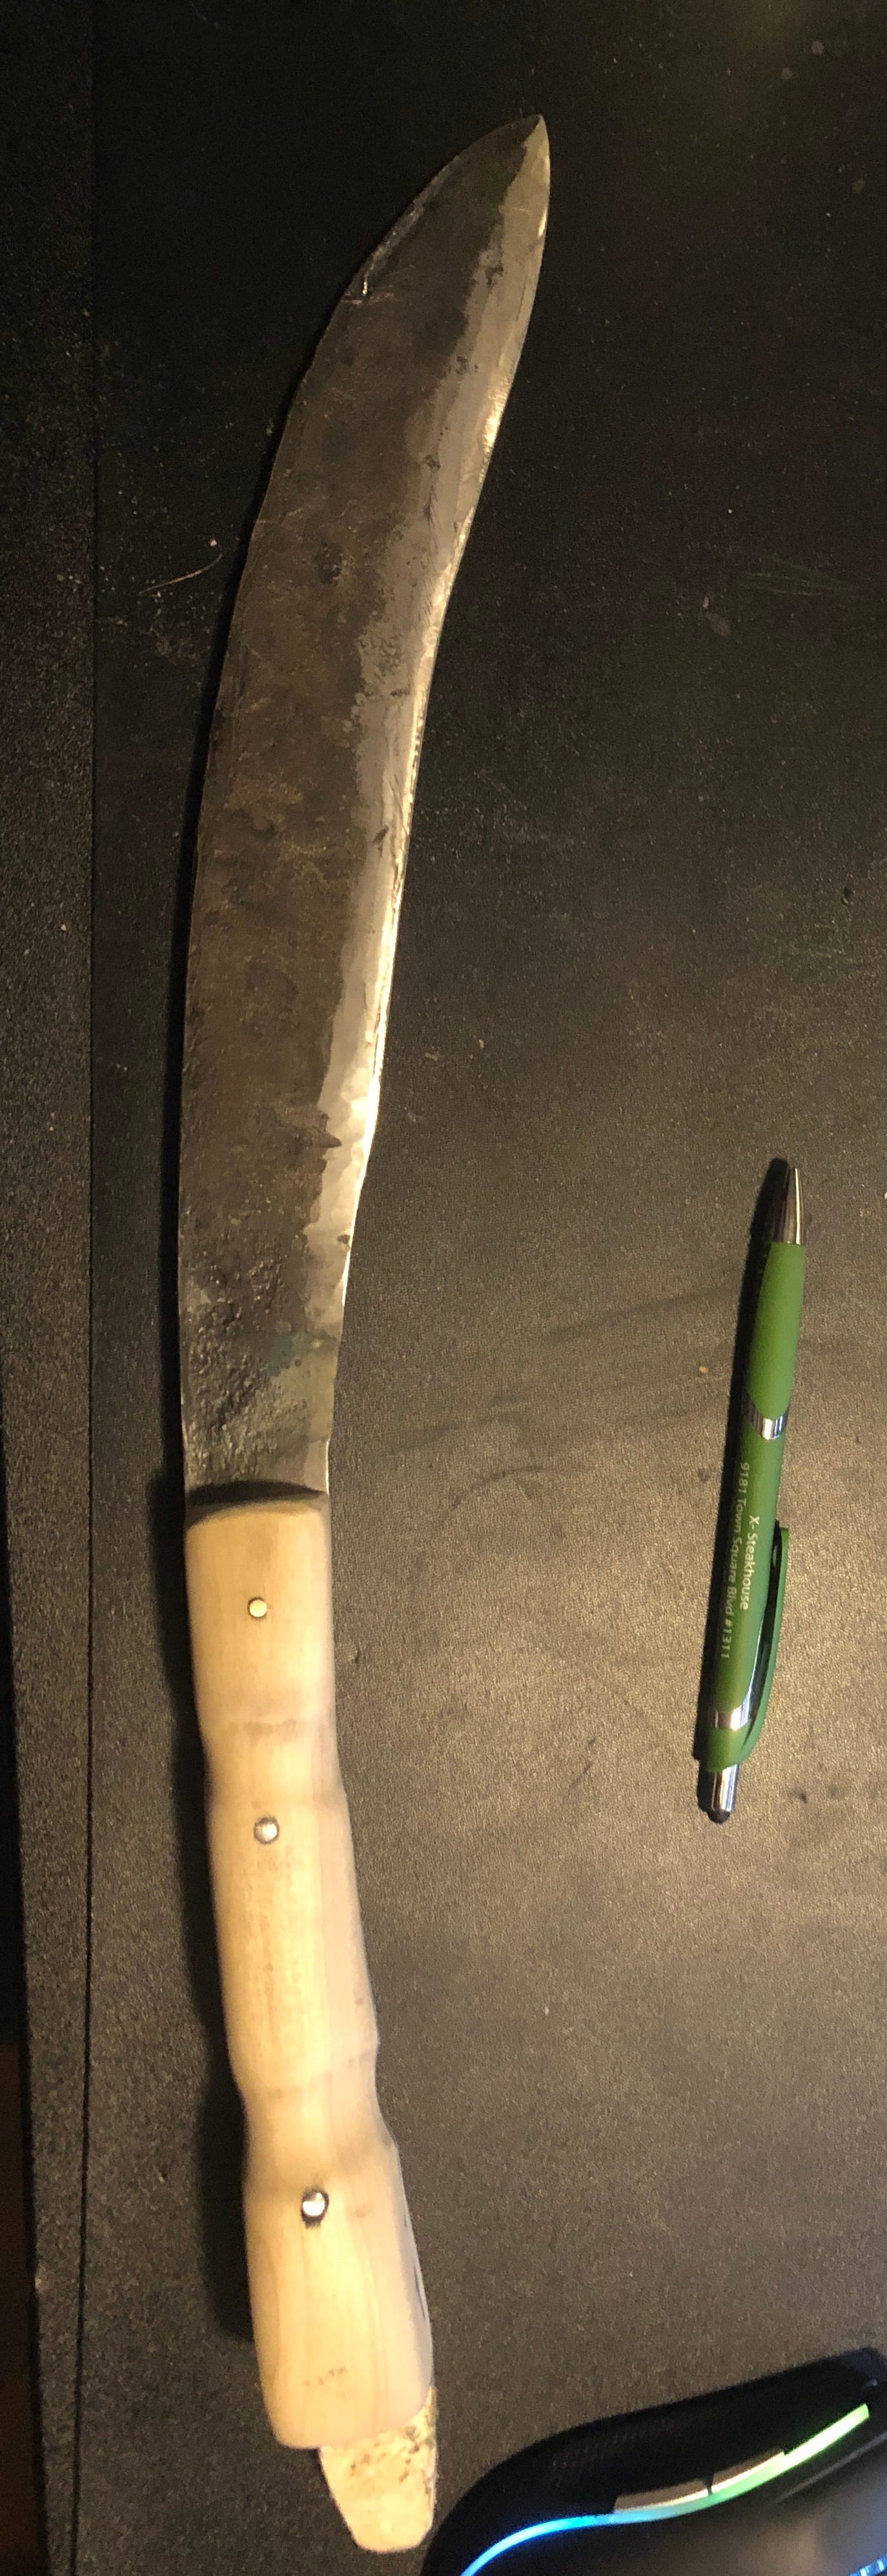
Lil’ Choppy turned out really well, I have to say. It’s been super handy for clearing brush, and trimming bushes, holding a really nice edge well enough to just swipe through inch thick branches and whatever you call the straggly bits that come out of bushes. I think I will make a few more in the future as gifts.
Speaking of gifts, you might be wondering what the hell that third sharp looking thing in that picture above was. I am near the email limit, so that little special guy and a very special mother’s day gift will have to wait for the next picture dense edition of Doc Hammer’s Anvil!
I have no great love for those two stores, but I really appreciate the little kits they provide every Saturday. They come with all the bits and nails, plus stickers often, and give the girls a good opportunity to use hammers and sandpaper to make something pretty solid. So credit where it is due.
You also don’t know what type of steel it is in terms of alloy, but that’s another matter as well.
As usual I have nothing to add, except to say I always find your blacksmith work interesting and informative.
I love it. Skills! Skills. Is there any reference material you recommend? Not that I am going to try to pick up welding, but it is fascinating to me and I would like to know more.