

A Few Weeks of Smithing
Spread over nearly two months...

Note: A whole lot of pictures in this one, so you won’t be able to read it all in email. Click above to go straight to the Substack site, or read in the app if you are on a little device, etc.
It’s been a long… good lord, few months? My actual job has been absorbing all my time and mental energy, way beyond what I would prefer. If any of you have ever been engaged in User Acceptance Testing in an SAP implementation, one that is going very badly, you know what I am talking about.
So this update has been a while in coming, with projects back from when it was still warm out, before my forge broke and I learned to weld enough to put it back together. I am breaking the projects into groups; I typically have many irons in the fire (well, steel, no iron) and work on things in parallel, but what the hell. Now that many are completed I might as well show them together!
KNIVES!
So for my birthday back in September my dad picked me up a box of old chisels and tools. Around the same time, a nice neighbor lady who walks her dogs by my house came over and offered some tools she inherited from her dad, free to me since she and her husband weren’t handy and they just took up space. We got to talking and she mentioned her husband broke her ceramic paring knife opening a bottle of wine1. One good turn deserves another, and since I had some 1095 still around I decided to make a new one for her, one that will be robust to wine bottles.

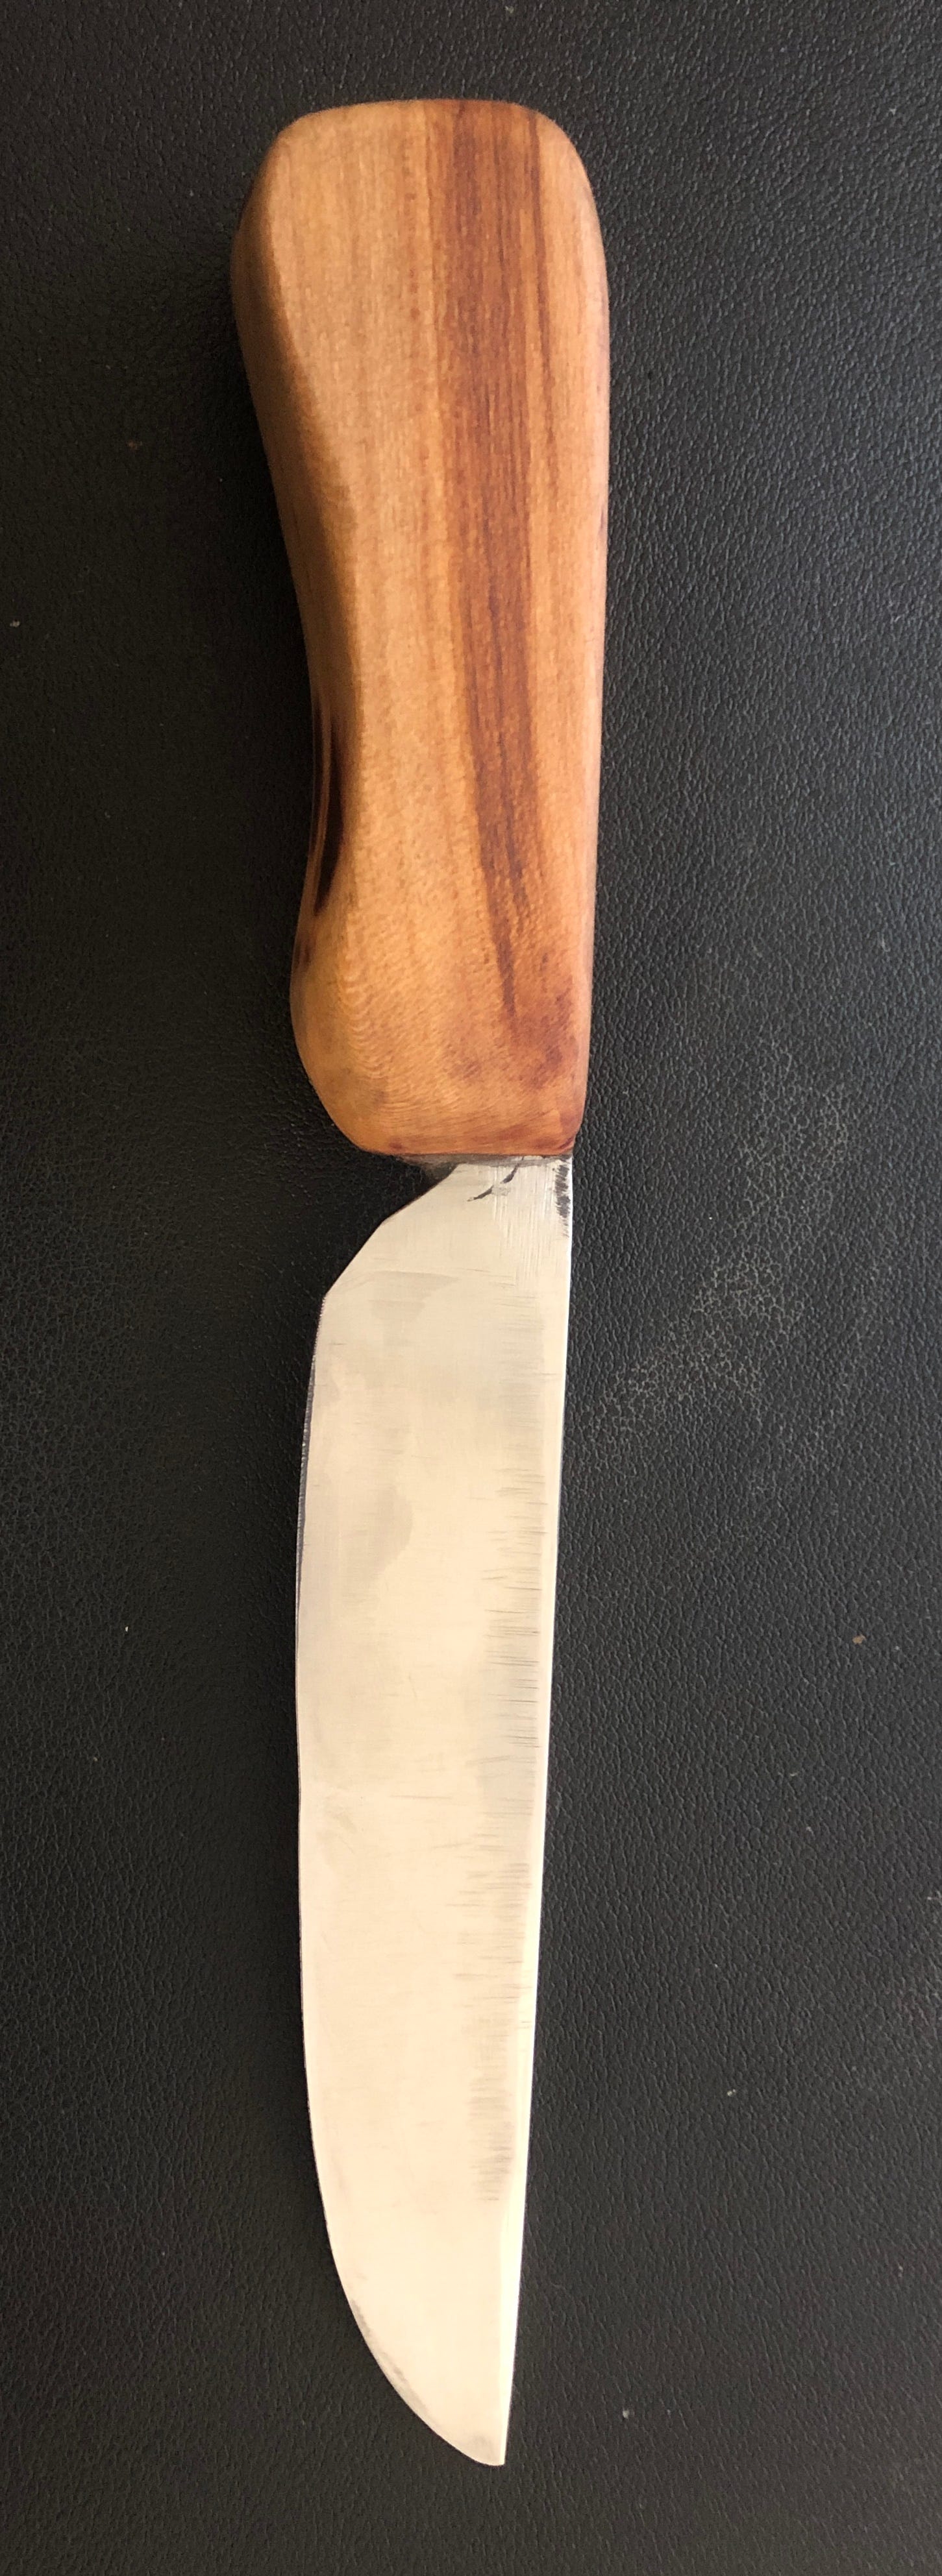
Neighbor lady was very gracious, even though I fear the handle is too small. Then again I have biggish hands, and my mom has commented that I like knives with oversized sword handles, so there we go. I completed this little knife before I got my new 2x72” belt grinder fully operational, hence the slightly wavy edge, but the thing looks great when it isn’t blown up to 10x size. It’s only like 6-8” long in total.
But man… that new belt grinder… more on that soon.
SPOOKY GHOST!
This was a project I first saw over on Black Bear Forge. It’s a nice little project, basically just using whatever random steel you have. I used a ~1.25” wide bit of thin rusty scrap. Super simple: use a hot chisel to cut out the little splits, hammer them into interesting shapes, shape the head and body, punch through for the eyes and mouth, then bend the legs to support. The first run took about an hour, and it was quite fun!
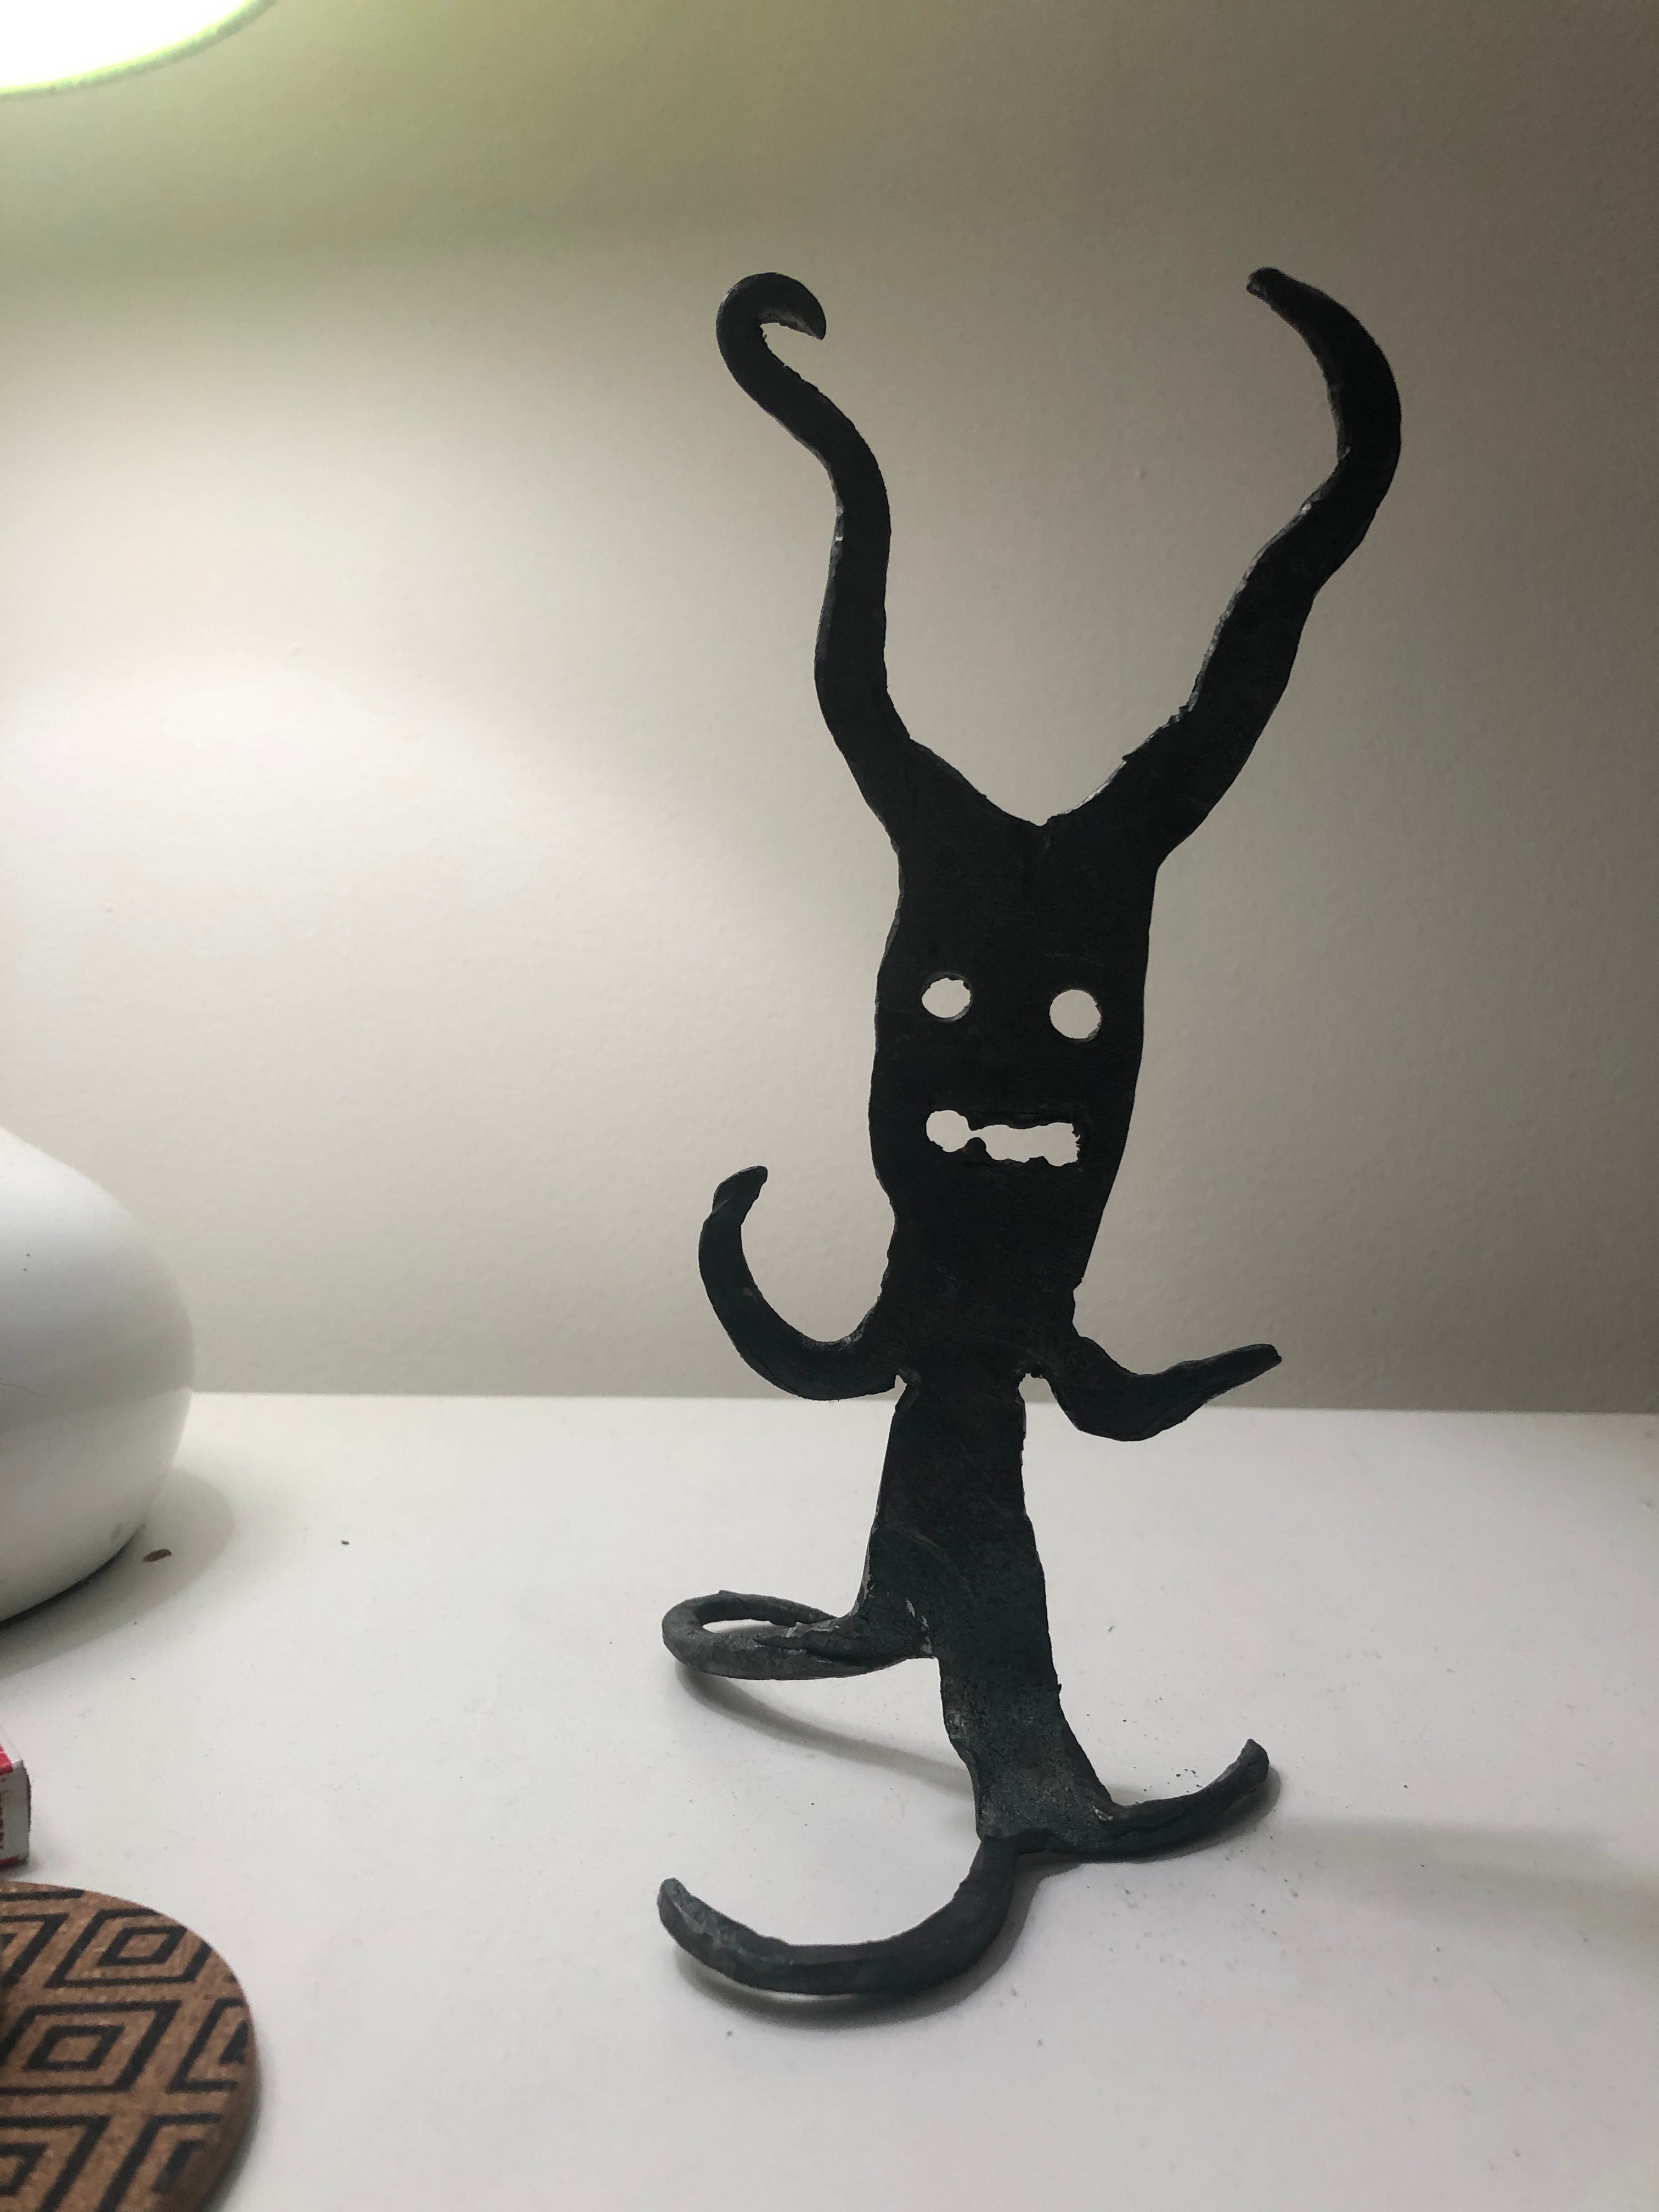
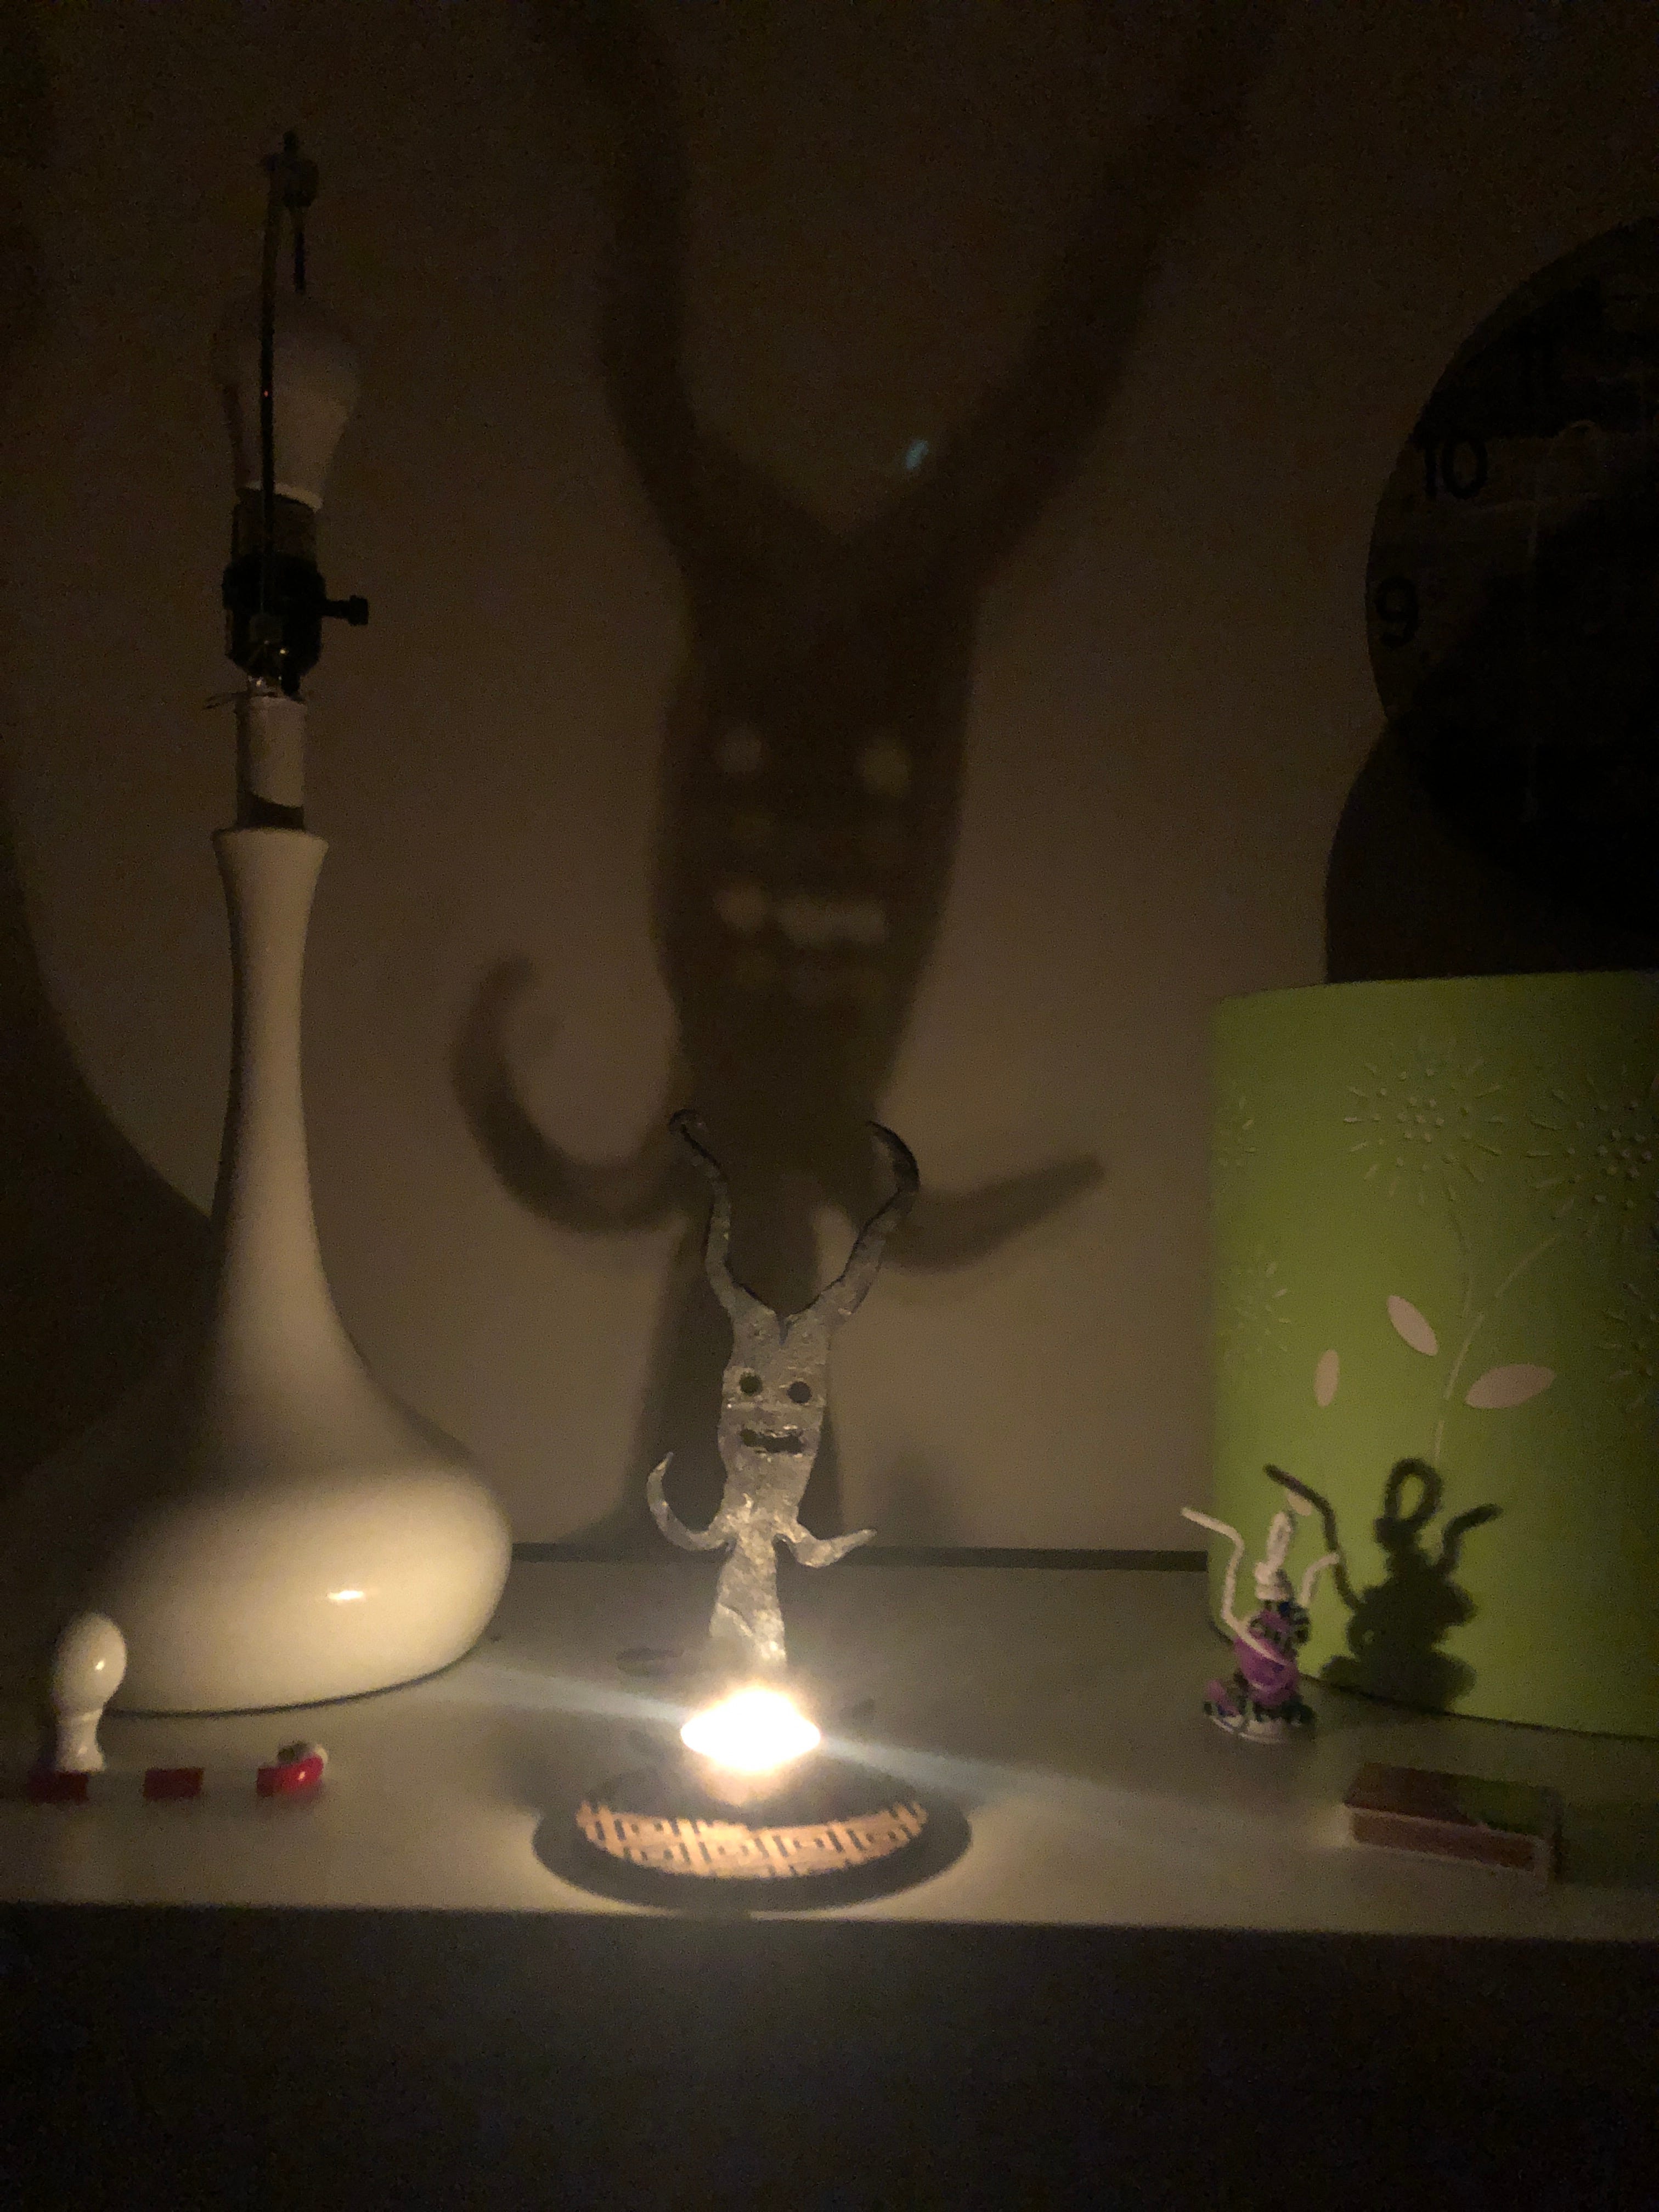
The girls like it pretty well, then got really excited when they realized it was just like the one they saw “the old man making on the TV!” So, note to self, if you want to please the kids worry less about the qualities of what you make and more about whether or not they have seen it on TV, I guess?
Now, if I make some more, and I probably will make a few just so each girl has their own decoration, I might forgo some of the chiseling and instead use a hack saw or angle grinder to cut the slots for the arms and legs and things. However, for anyone else just starting up blacksmithing, I would really recommend this project, exactly because it can be done with just chisel, punch and hammer, so you really practice a lot of useful skills. Bonus: much like dogs are the hardest thing to draw and demons the easiest, you can futz around with different shapes and styles, and if it doesn’t turn out right it is still just fine.
So thanks for the idea, John!
FORGE!
I already posted pictures of that mess, but I forgot one I wanted to share.
See, most gas forges are built roughly like foundries: you have a steel shell insulated by a layer of ceramic wool insulation and a fair bit of refractory cement2. The wool provides most of the insulation, while the cement also holds in heat while protecting the wool from getting torn or dissolved by acidic welding flux (and you, since most wools release little fibers that stay in your lungs forever.) You could make the whole thing out of the cement, but it would weigh a ton and take forever to heat up.
Now, the recommended thickness for refractory cement and wool varies. Most designs I have seen recommend 2” of wool between the steel and the cement, and the manufacturer of the refractor cement I have recommends 3” of cement on top of that. The Mr. Volcano forge has 1” of wool, and ~1/2"-1” of cement. Not ideal, partially because it loses a lot of heat, and partially because it doesn’t take a lot to break through the refractory and expose wool.
To keep your work pieces from damaging the bottom of the forge one typically uses 1” thick hard fire bricks. These are basically bricks, that resist fire. Regular bricks do not; they soak in liquid very easily and then explode when heated. The reason you don’t make the entire forge out of the bricks is that they don’t hold heat well, rather just reflecting it, although you can make perfectly suitable little forges out of them.
The other reason you don’t make forges entirely out of fire bricks is that unlike refractory cement, they don’t resist fire all that well:
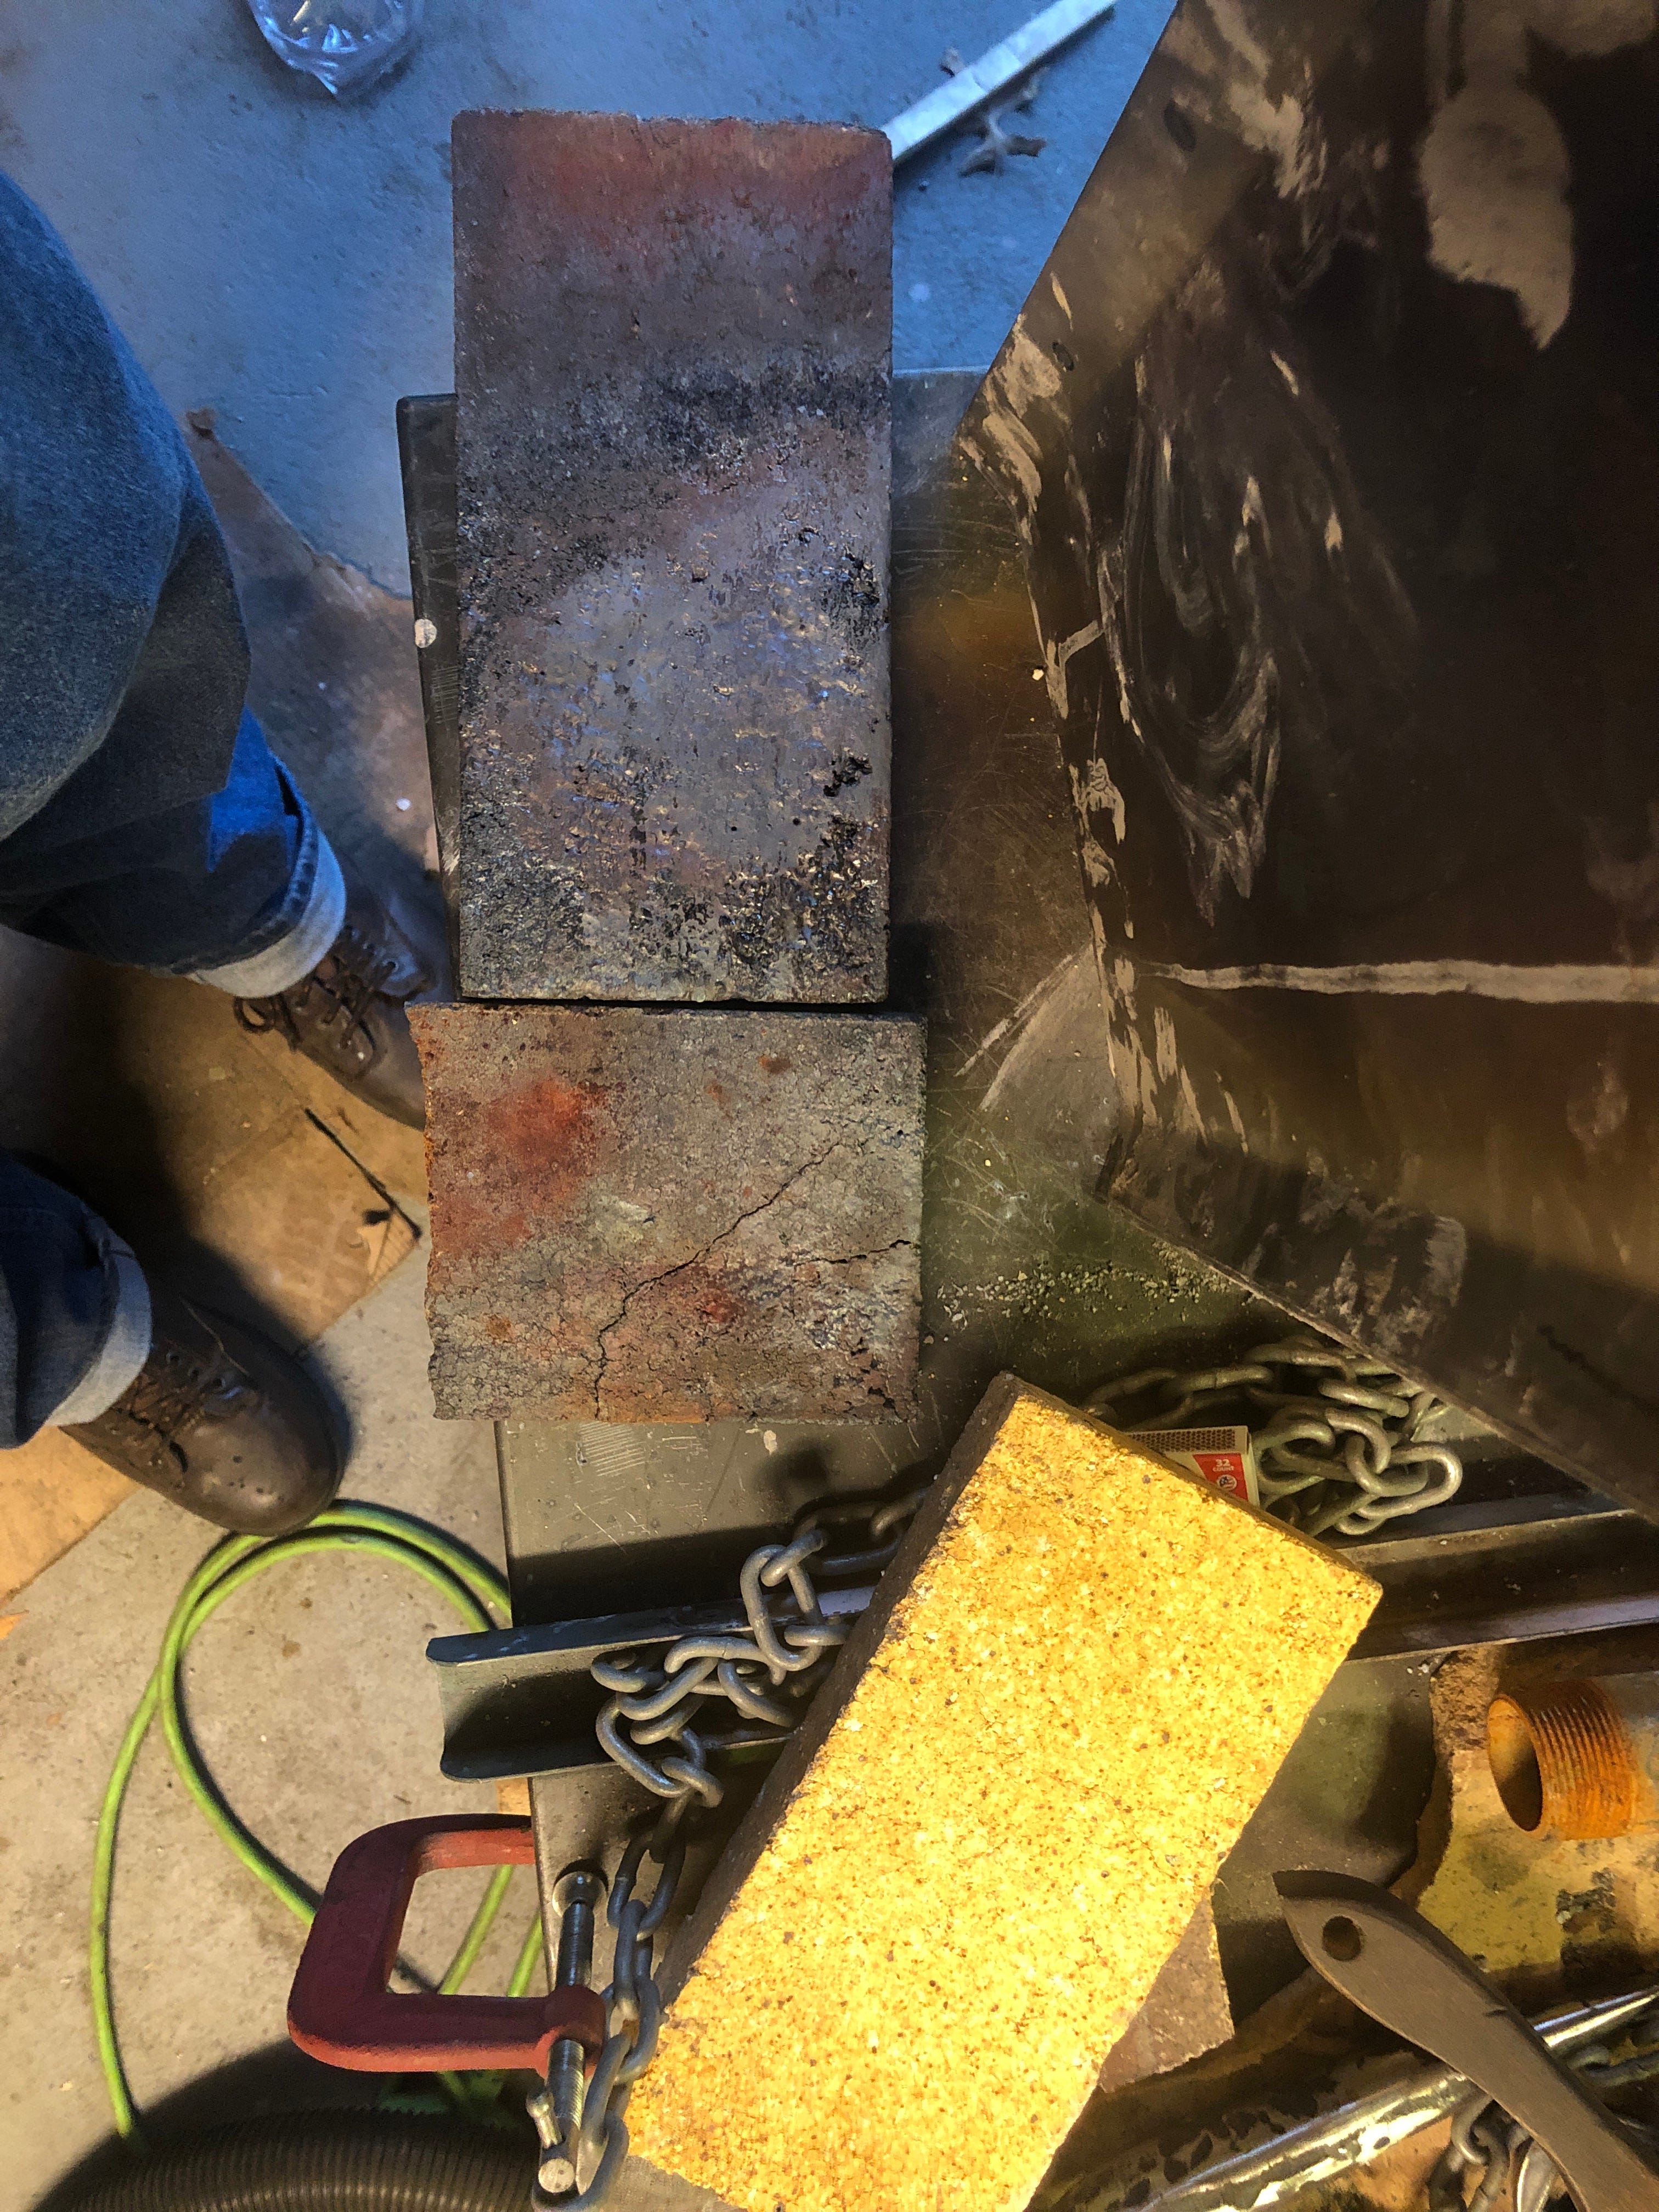
Those two black/brown things there with the glassy melted surface? Yea, those used to look just like that nice warm yellow brick at the bottom. In fact you can easily tell where the burner I use (I rarely use both burners in the forge) hits the brick, literally having melted the surface to glass. Glass with a little Borax mixed in perhaps. Fire bricks are usefully permanent in a fireplace where it rarely gets above 1000 degrees; they are disposable when it gets around 2000. 3
Still, they are surviving and I can get some more use out of them, which is good because the buggers cost like 6$ a piece these days. I checked around locally and it was literally cheaper to order BRICKS shipped from Amazon rather than buy them here. Anyway…
BILLHOOK!
Another fun bit of rusted toolery my dad had around the barn was an old billhook. While the forge was down I took some time to get it de-rusted, sharpened up and mounted on a new handle. Of course I neglected to take any pictures before it took its vinegar bath. I promise to do better.

The way billhooks attach is kind of neat. There is the top head socket that is permanently attached to the blade like that of an ax or hammer, but then there is another lower socket that is removable, more like a thick metal strap, held on by a bolt or rivet. In between the two is a swelling of the handle, such that when both are attached there is no way the head is coming off outside of the handle breaking. This is a nice feature, especially for a very heavy cutting implement you are going to frequently be using above your head.
I learned a few things here around cutting and shaping the handle that are useful to share:
1: Cut the hole for the head socket a bit deeper than you think, so it can project a half inch or so. At least for this bill here (which apparently had the top socket replaced once, as that isn’t my welding) the socket isn’t an hourglass shape like a hammer or most axes, but rather tapers continuously from the bottom to the top. As a result, if you want to put a wedge in to hold it, the top of the wedge and handle has to extend beyond the steel, not be flush with it. If you don’t, the wedge will just pop the head higher.
2: Cut the groove for the lower, detachable socket at a slight downward angle. But cutting mine horizontal it allows for a little wiggle room upwards. Not enough to cause problems, but it is annoying and avoidable.
Even with those mistakes I would correct if doing again, the bugger is still solid enough to chop through some 6” tree branches at my dad’s place. Bills are excellent for that: the curvature of the blade ensures that no matter where you hit, it will dig in deep. That’s exactly what you want when swinging over your head to hack through branches and the like, or just don’t want to risk the tool glancing off and going in a random direction at high speed like an ax can. If I had to chop down a tree in a standard manner a felling ax is still the way to go for efficiency, but for limbing a tree, down or standing, a billhook is great.
It is also amazing for removing limbs from humans on the battlefield. Just saying, very versatile tool, like a kukri on a long stick.
OTHER KNIFE
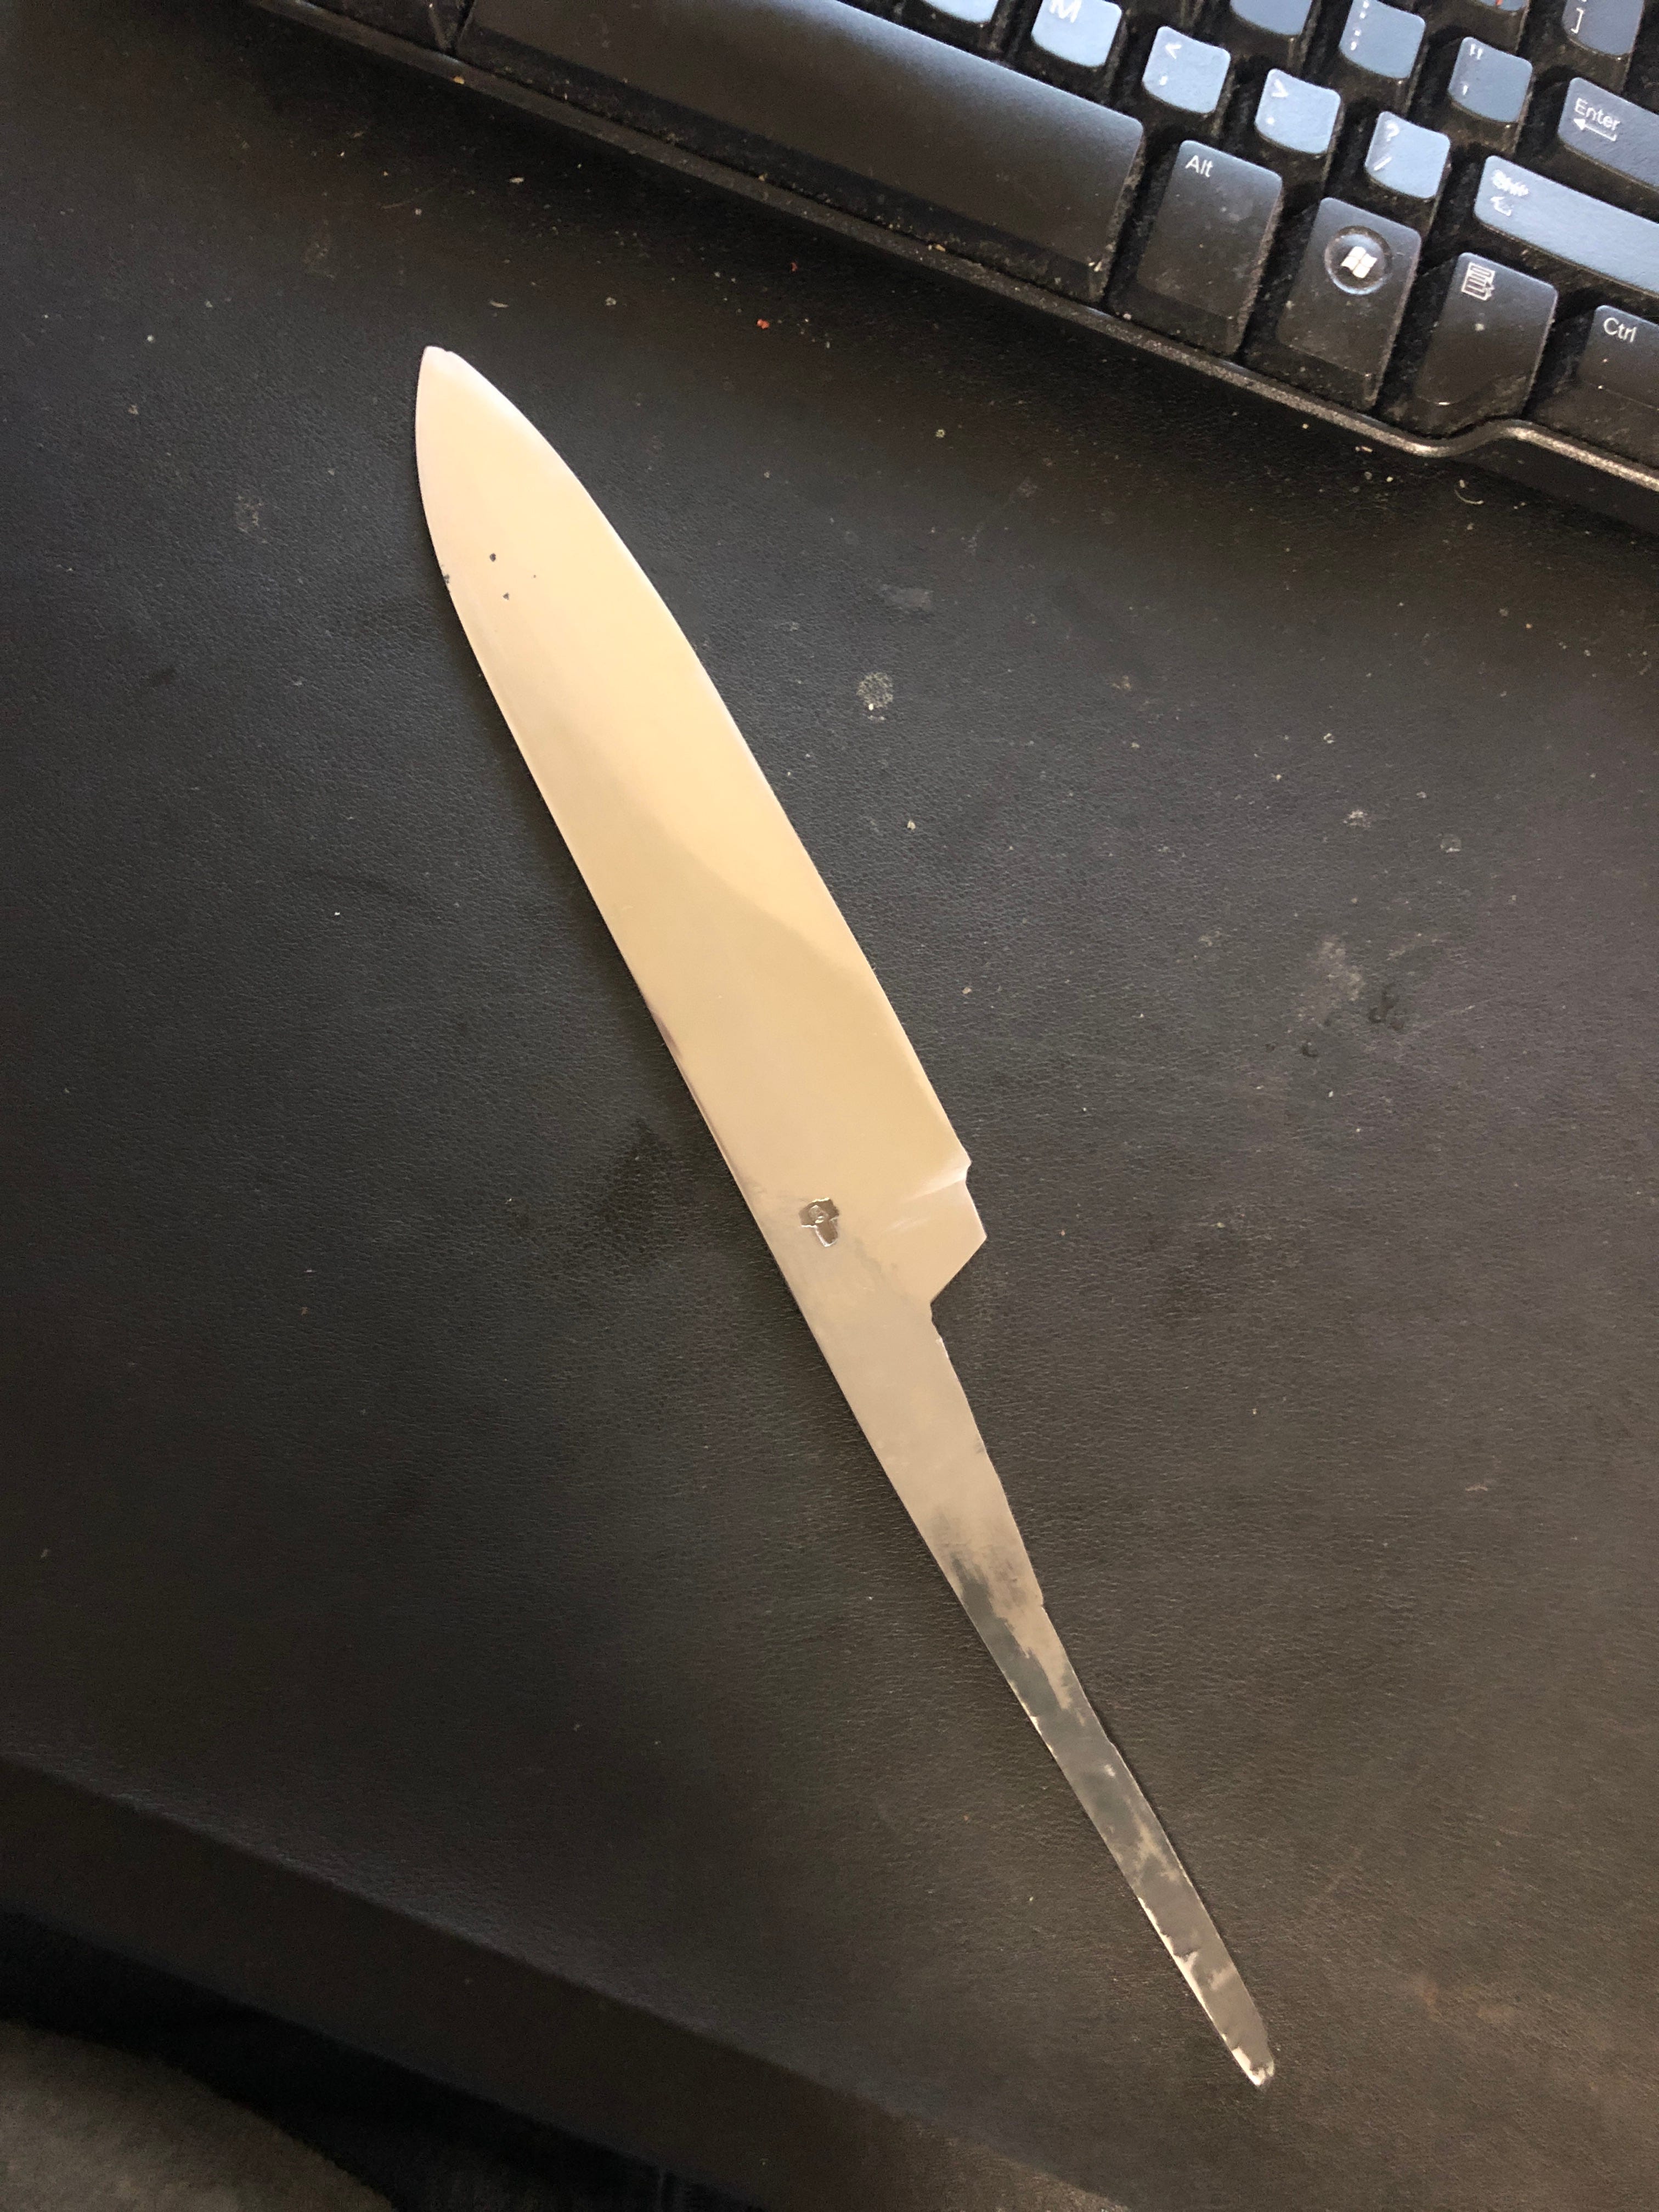
Remember that really ugly, hammer marked knife blank from way up there, the one next to the pretty little paring knife? Well, that was made from a giant old chisel that had seen a lot of abuse. After an hour or so of loving caresses on the 2x72” grinder, however, it was all cleaned up to this:
Much better! (And thinner… I took away a LOT of material there.)
What’s that darling little mark there, you ask? Why, it looks like a small hammer with an E inside!
Yes, I tool some time and frustration to carve my own touch mark4. Not just as a mark of vanity, but sooner or later I am going to want to start selling knives and axes and things I make, if only to make room for making more, and it is nice to have a little mark so people can recognize them. I don't know, all the cool smiths do it.
So many do it, in fact, that getting a touch mark made by someone else costs like 150$, which… yea no. I had a crappy punch, I had a Dremel, I can do this. Kind of. It isn’t as clean as I would like, and if you look really closely you will notice… I put the E in backwards. Because sometimes I forget spatial reasoning and don’t account for the fact the thing won’t be facing me when I drive it into the metal. So I had to go back and try to correct that, and, well, you can’t really put the metal back… Still, it doesn’t have to look like much of anything, it just has to be consistent :P I can always make another one.
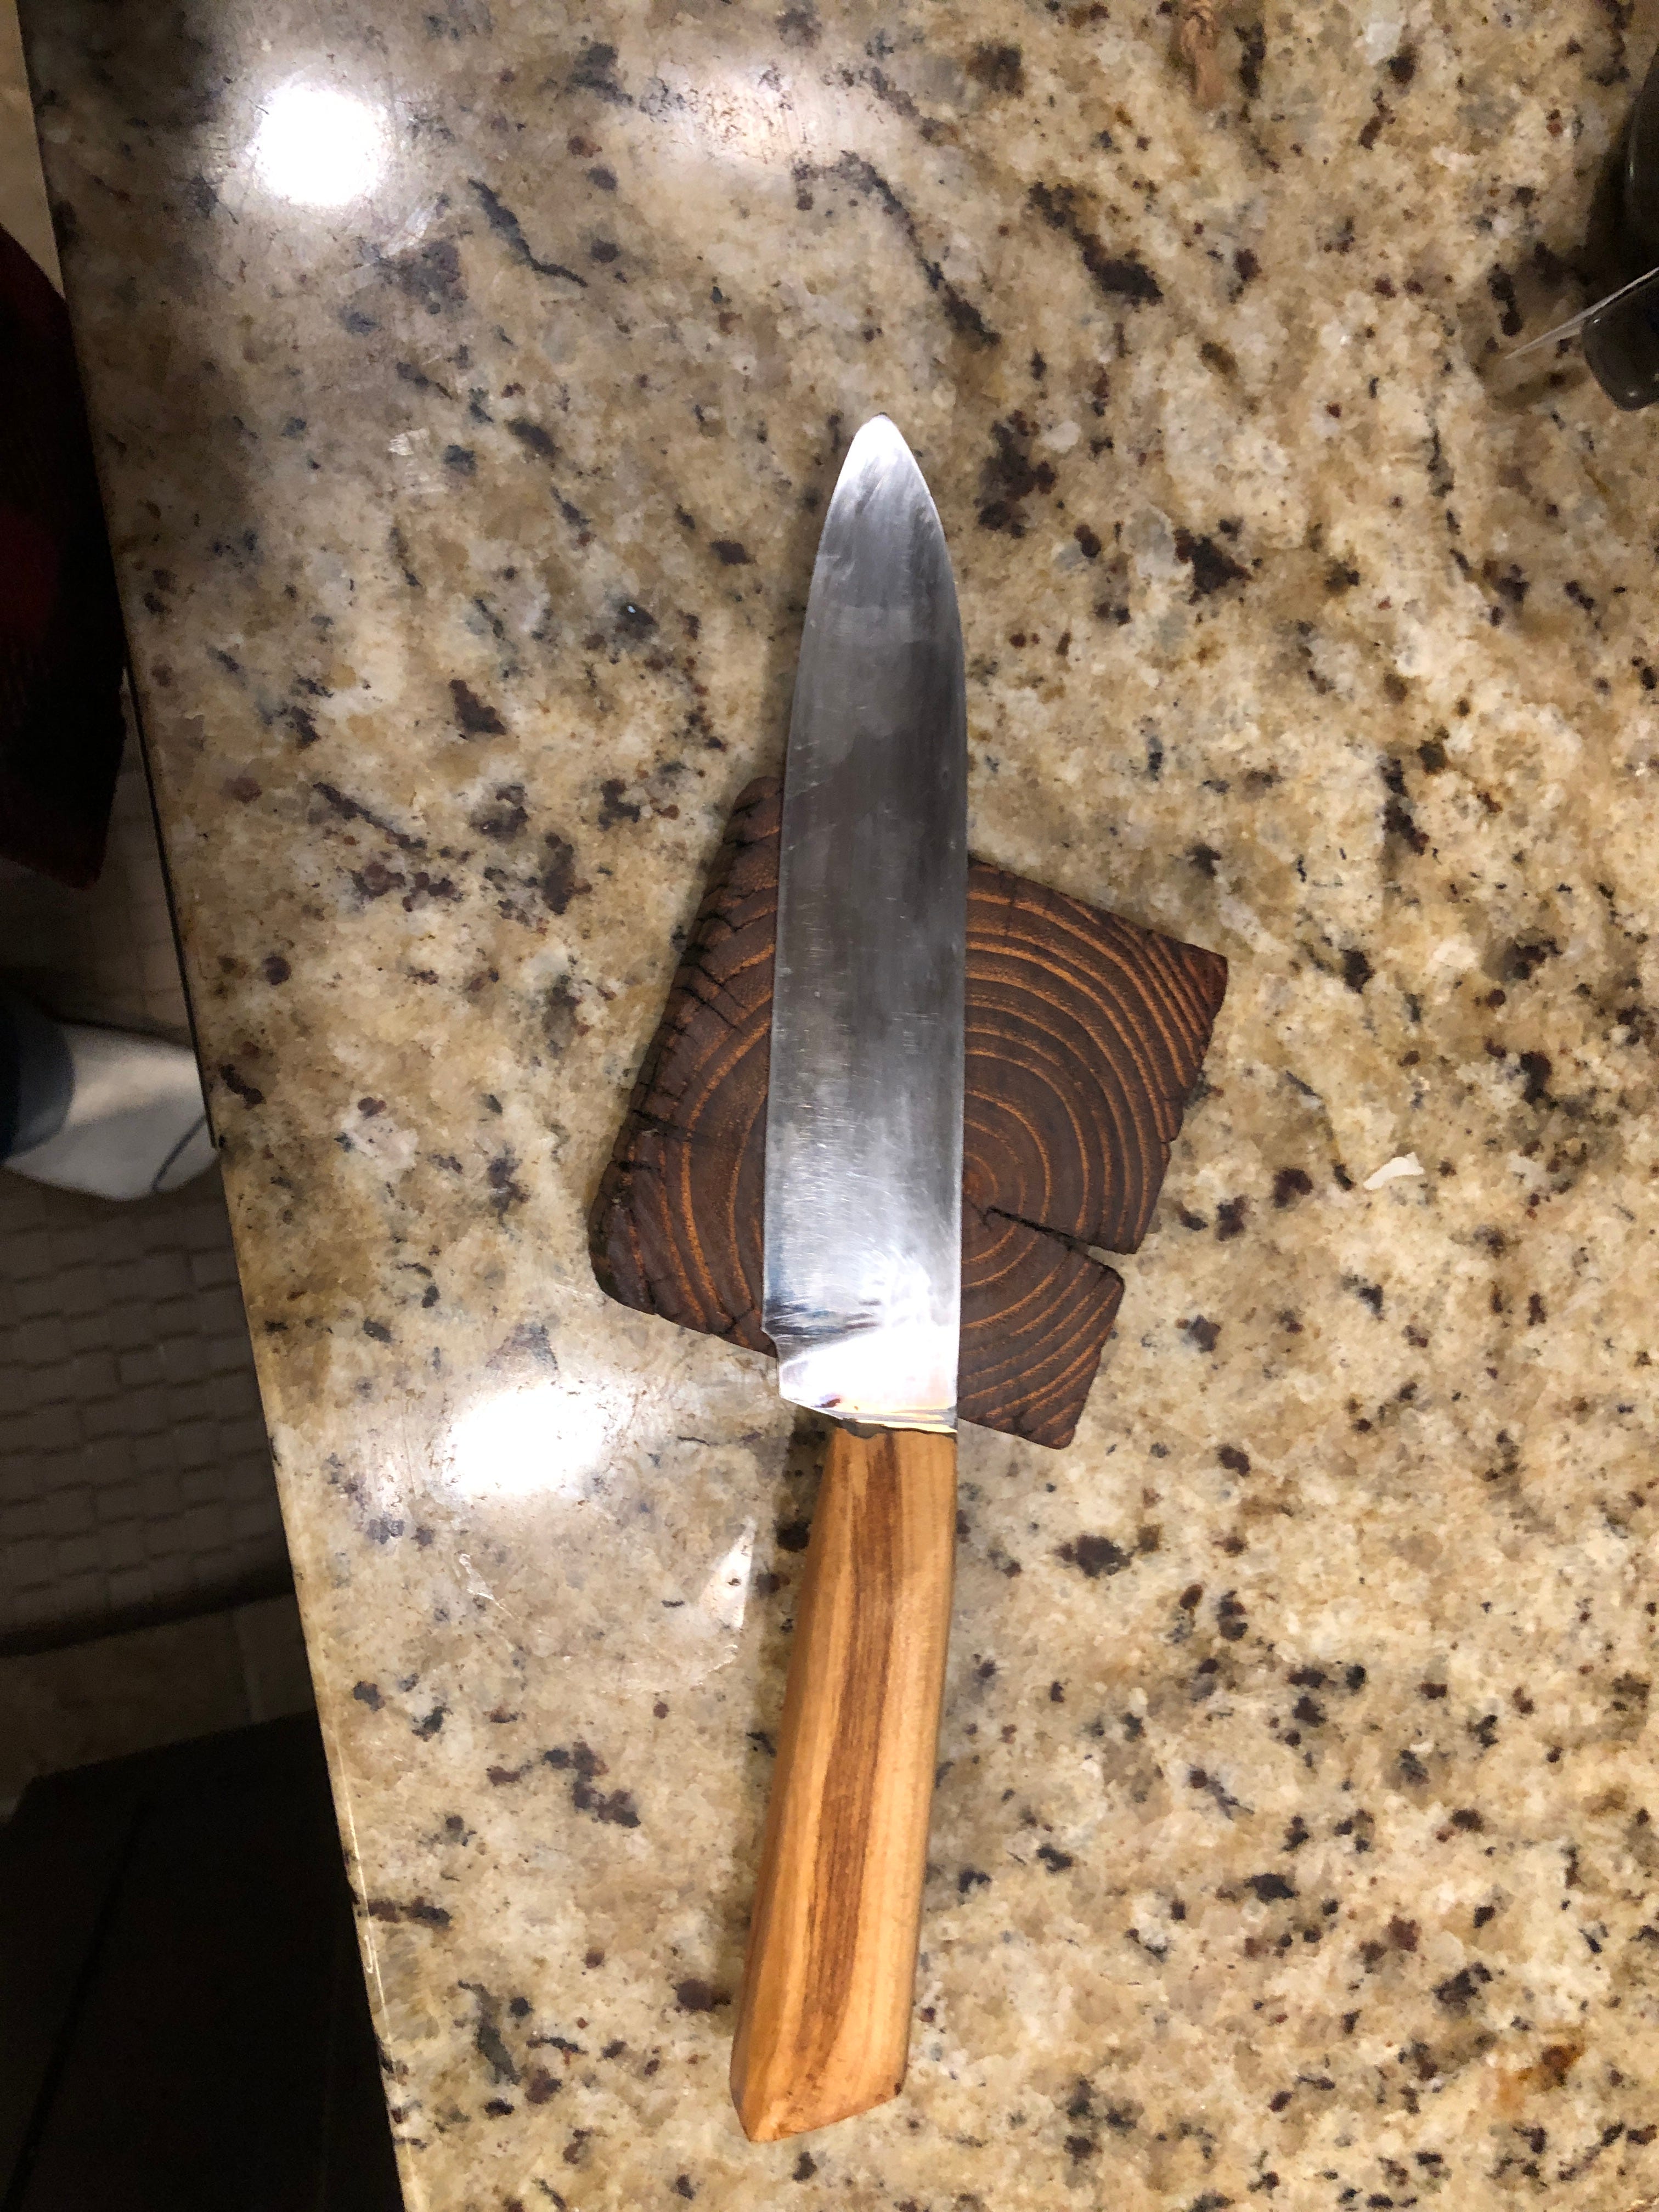
Anyway, knife! It’s pretty! My dad as always came through with some nice maple off cuts for the handle, and it is very pretty!
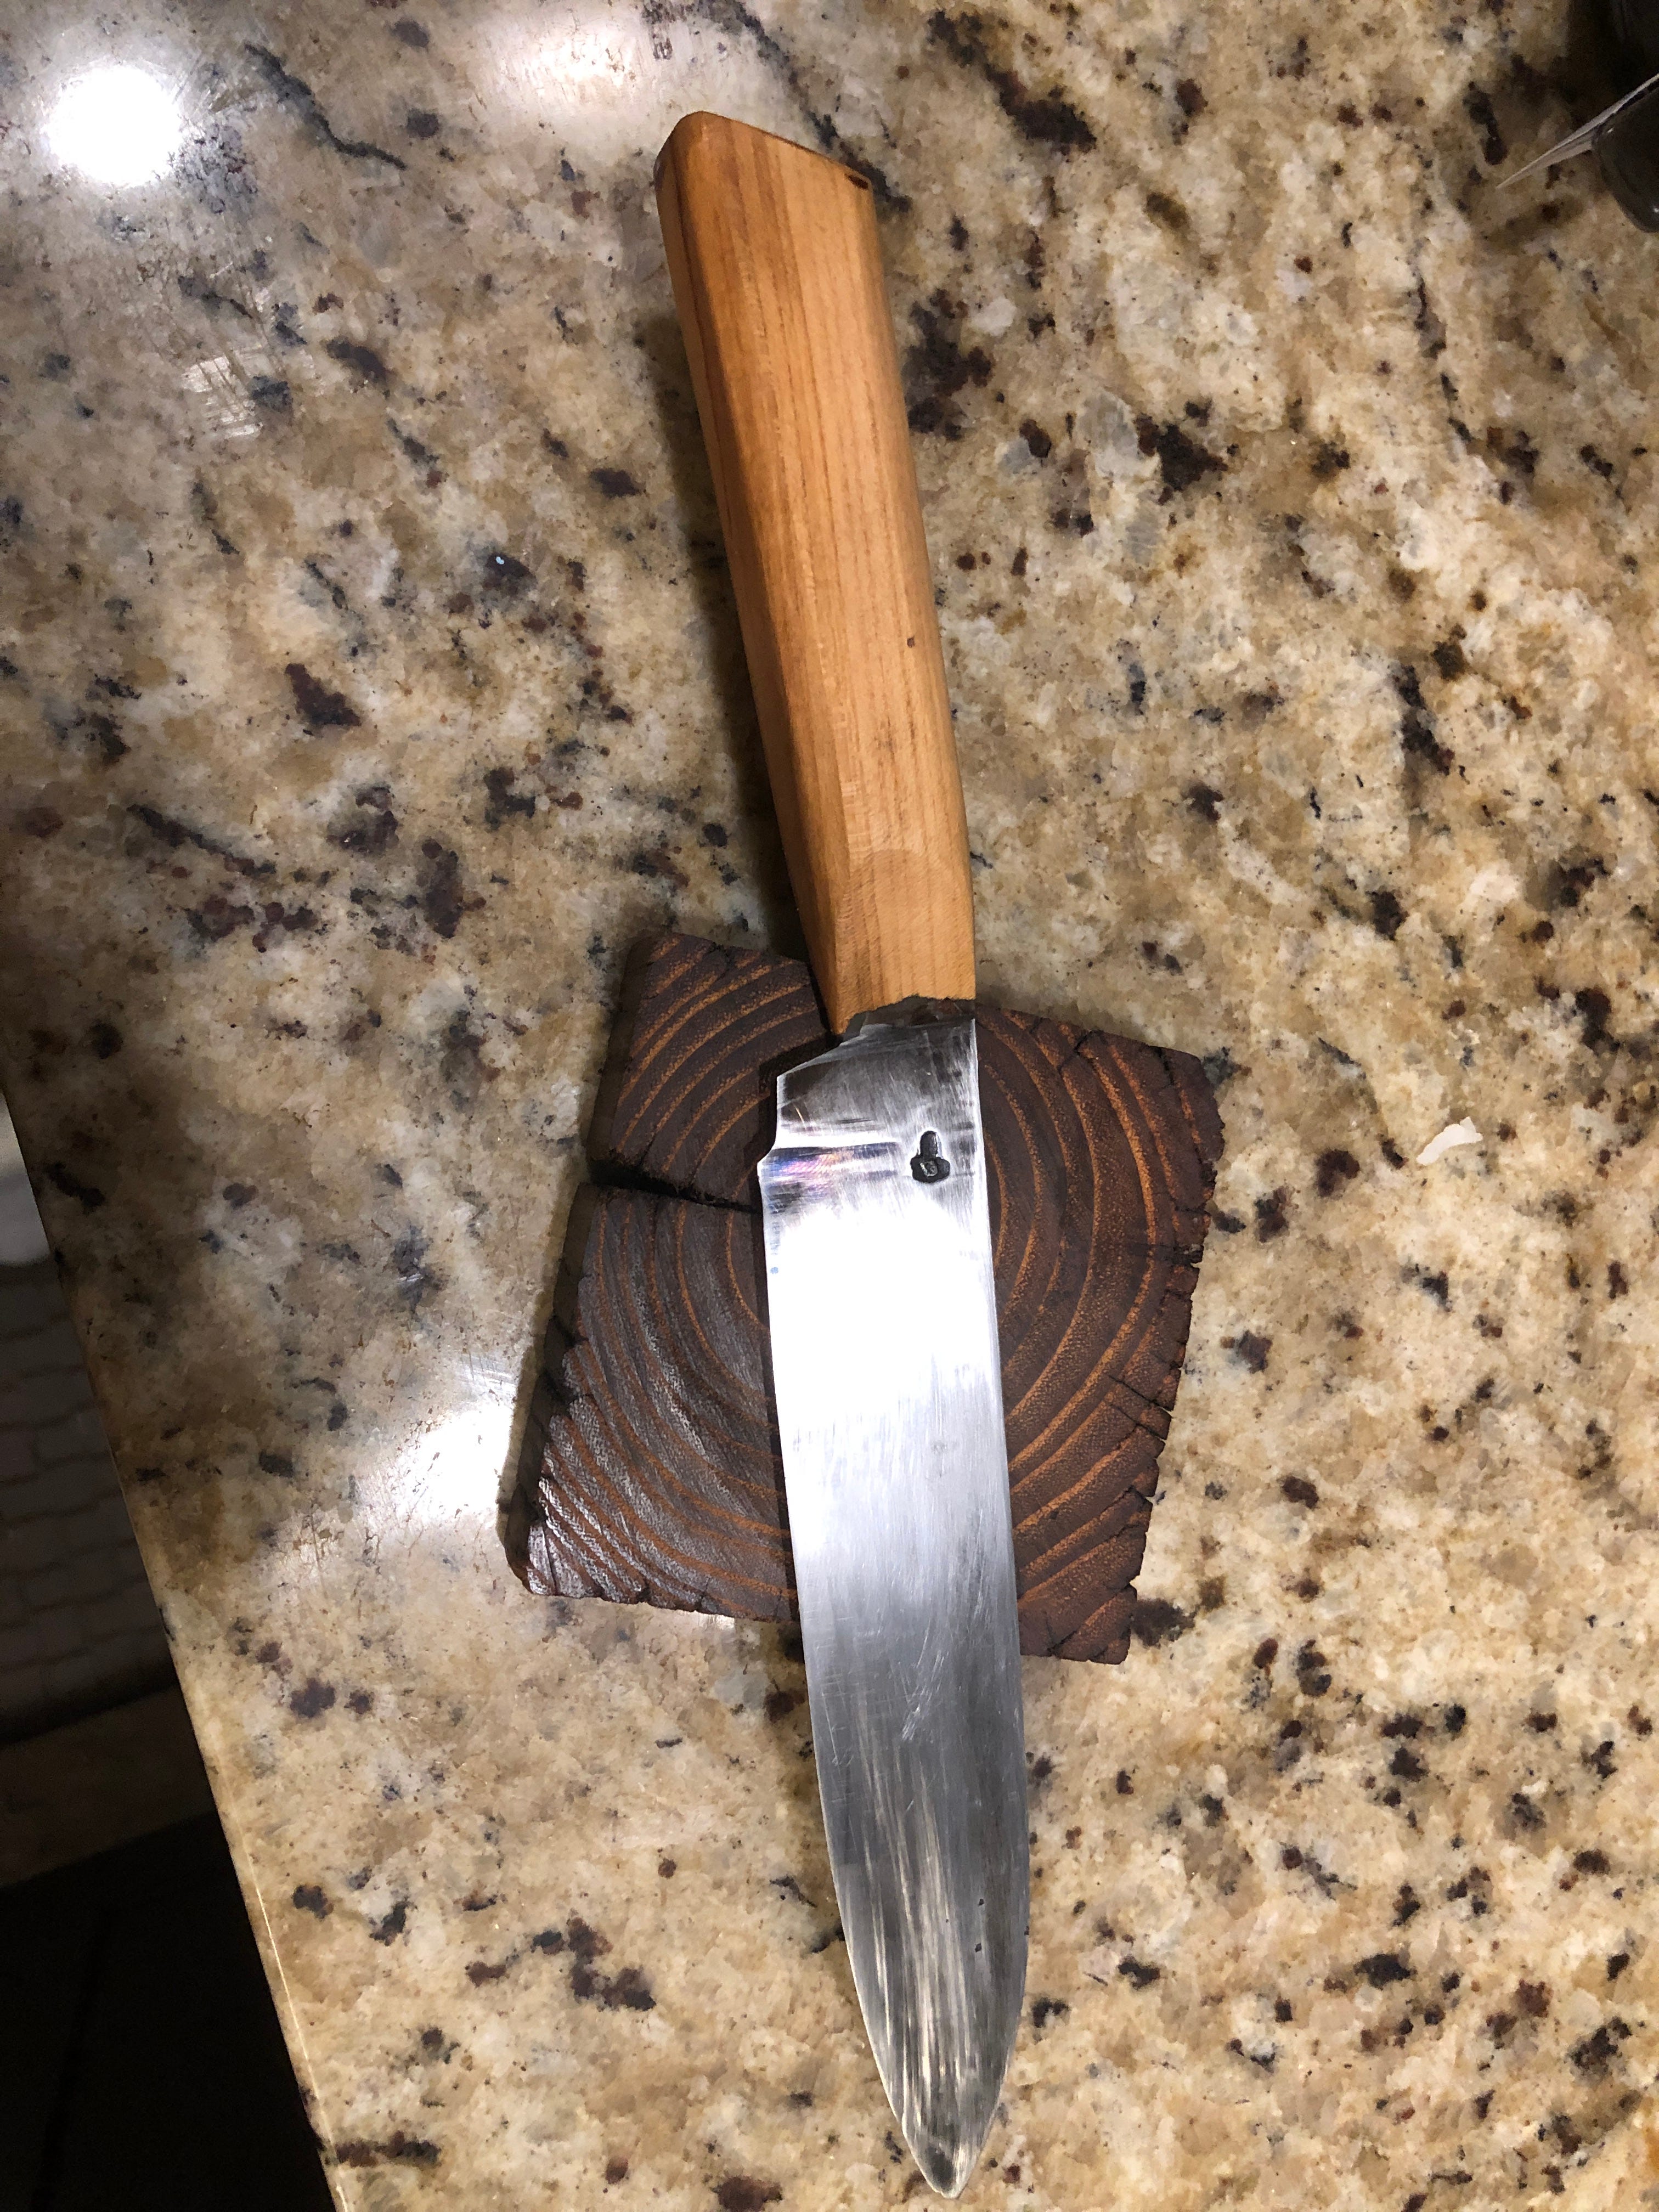

Also in the image are some really nice looking coasters my dad made out of 40 year old locust wood fence posts. They don’t retain the smell of the horses rubbing up against them, but I helped/watched those go in as a little sprog, and they look like brownies with caramel swirls, so I like them a lot5.
The observant among you might notice that the blade shape isn’t quite the same as it was way at the beginning. That’s because
1: I did the pre-heat treating grind probably a bit too aggressively and had the blade too thin and
2: the metal had some serious internal stresses from being a chisel
resulting in about 1/4” snapping off the tip during the quench. Just as well, the grinder worked on that, and better that it breaks then rather than when in use. I am glad it didn’t crack halfway down.
Others might observe that there is a slight bluish purplish tinge to the blade. That’s not a cute Pride Month finish, but rather the result of a post grind tempering. After doing the first tempering cycle and blade finishing I was concerned that the blade was still too hard, too brittle to really use. So I went at it with a propane torch to temper it down a little so it is more robust. That process creates little oxide colors on the surface, which is how you know how hot it got. I tempered the edge to a straw color, and the handle/spine area to a pale blue/purple. The reduction in hardness means it will need to be sharpened a bit more frequently, but will also be much more resistant to breaking or chipping the edge.
Thing is, since I did all this AFTER grinding and polishing, I couldn’t get all the oxide off. Usually you just take all that off while grinding, but I didn’t want to remove material at all at this point, so I just used some 1000 grit sandpaper and oil, then buffed it up to a near mirror finish, simultaneously removing most of the color and highlighting all the tiny polishing flaws remaining. Yay?
Still, I am quite proud of this knife. The handle is big and comfortable, the blade is crazy sharp, and it looks nice I think. I’ve been using it as my main kitchen knife since before Thanksgiving and it is still cutting like everything wants to get the hell out of its way. This was the first knife I made start to finish with the new grinder, so thanks again to Rich for selling it to me!
…
Ok if I cut off the last half, this fits an email. I will finish up that half and post it later.
Choppy and stabby bits to come!
Yea… don’t do that. Those things are basically made of glass, and if you get shards of ceramic embedded in your flesh, they can’t find them on an x-ray. That’s a Doc Hammer Safety Tip!
This is different for older coal forges, which basically just have a heavy steel box for the coal with a pipe underneath to bring in air. The coal itself provides the insulation while it burns because you can just pile it up on top of the work piece. Propane makes a poor blanket.
Of course you could coat them in refractory cement in a shell to protect them. I have an old foundry I made like that some 10 years ago, but how to make forges and foundries is something for a later post.
I have spent most of the last two months trying to find things were my brain could be half turned off that didn’t make me want to kill people more.
If you are looking for a Christmas ‘22 gift and “really attractive rustic coasters” seems like the best you can come up with, let me know. He can probably finish up a set of 4 and have them out to you within a day or two.
What a delight! I had no idea I'd find forgery (is that a correct usage?) so fascinating!
Another relaxing read here. That's how I experience it. If you start a chat I'll share a pic of my cute little wood store sometime